Adding a menu item which points to an Article
From Joomla! Documentation
This article is tagged because it NEEDS REVIEW. You can help the Joomla! Documentation Wiki by contributing to it.
More pages that need help similar to this one are here. NOTE-If you feel the need is satistified, please remove this notice.
Reason: Update images to 2.5 or 3.x
The following tutorial will show you how to create a new item in the main menu that points to the article called Support and Documentation. Based on this information you will be able to add a new menu item to any of your defined menus pointing to any article you have previously created for your site.
Tutorial[edit]
If you are not currently logged in to the administration panel, you will need to do so. If you are already logged in, you do not need to complete this step.
- Open a new browser window and type in the URL, which will be similar to http://www.your_site_name_here.com/administrator or, if you have Joomla! installed on your local computer, http://localhost/administrator. Here you will have to log in as an Administrator or Super Administrator.
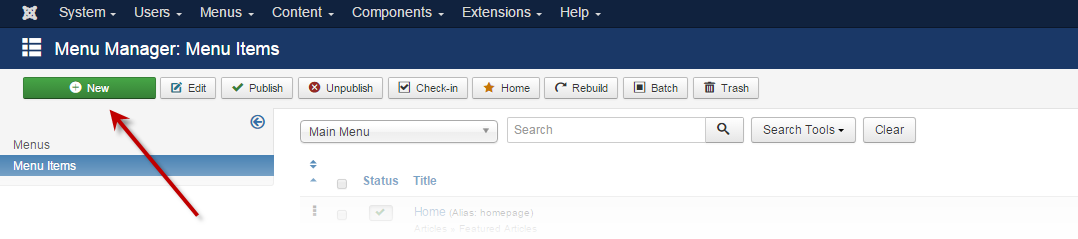
- Within the site administration panel, select Menus from the menu bar in the upper left corner. From the drop-down list, choose the menu you wish to work with. The menu can be Main Menu, available by default, or any other menu. This will open the Menu Item Manager page. You can also select "Menu Manager" from the left column and then select the menu you need from the list provided.

- From the row of actions in the upper-right corner, select New (represented by the green icon with the plus sign). This will open the Menu Item: [New] page.
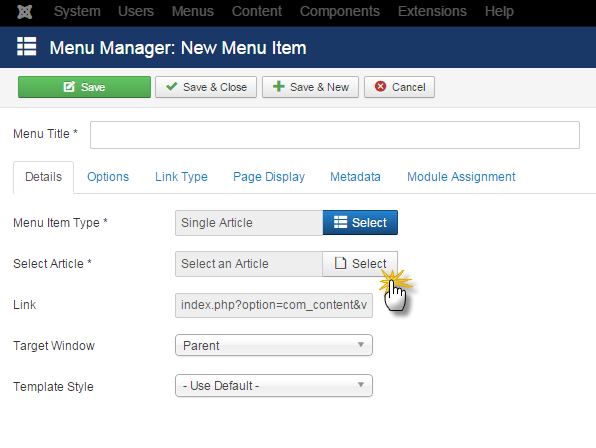
- From the Menu Item Page click on the Select list for "Menu Item Type".

- From the list displayed," choose Articles.

- Choose Single Article in the previously expanded Articles section.

- Returning to the Menu Item Page, click on the Select list for the "Select Article" field.
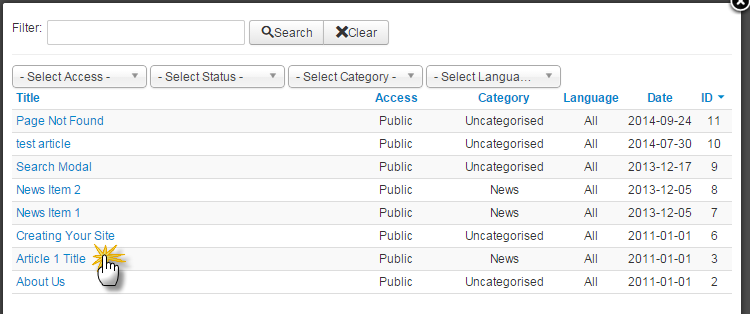
- A list of your Articles will pop up. Select an article by clicking on it's title. You can narrow your search if you have a lot of articles by using the dropdown tools at the top of the display.
- We are getting really close. Hold on! On the new page fill in the different fields as listed below. Note that the "Required" fields are indicated by an asterisk(*) next to the label:

Menu Item Details
- Menu Title
This will be the text displayed for the newly added menu item. For this particular case let's use the word Sample. Note "Menu Title" is a required field. - Alias
Usually, you will leave this empty and Joomla! will fill this in for you automatically. The content of this field will determine the page URL when SEF is activated. - Menu Location
This should already be set to Main Menu (or the menu you have previously chosen). Here you have the possibility to move the item to another menu if you wish. This field is quite useful when you decide to change the item location later. Note "Menu Location" is a required field. - Parent Item
Here you can specify where to place the new menu item. You can make it the Menu Item Root (top item) or a sub-item of an already existing item. We will choose Menu Item Root. - Published
If you wish your new item to be shown on your site, set this to Yes. If you would like to remove this menu item from the site, simply set this to No. It will not delete the item but will make it invisible to your visitors. - Ordering Click on the Save button at the top of the page and the Ordering drop-down will be visible. The new menu item will default to the bottom of the list, but you can change that by selecting the "First", "Last" or another menu item in the list to change it's position.
- Default Page You can select this option if you'd like this menu item to be your Home Page.
- Access Level
This option will specify who will be able to see this new menu item:- Public - All visitors
- Registered - Registered users only
- Special - users assigned to any group besides "Registered"
- Target Window
Here you can specify how to open the article. It can be the same browser window (Parent Window with Browser Navigation), a new browser window (New Window with Browser navigation) or a pop-up window (New Window without Browser Navigation) - Template Style - Select a specific template for this menu item, or leave as 'Use default' for the default template.
- Language - Select a specific language or leave the default "All".
- Menu Title
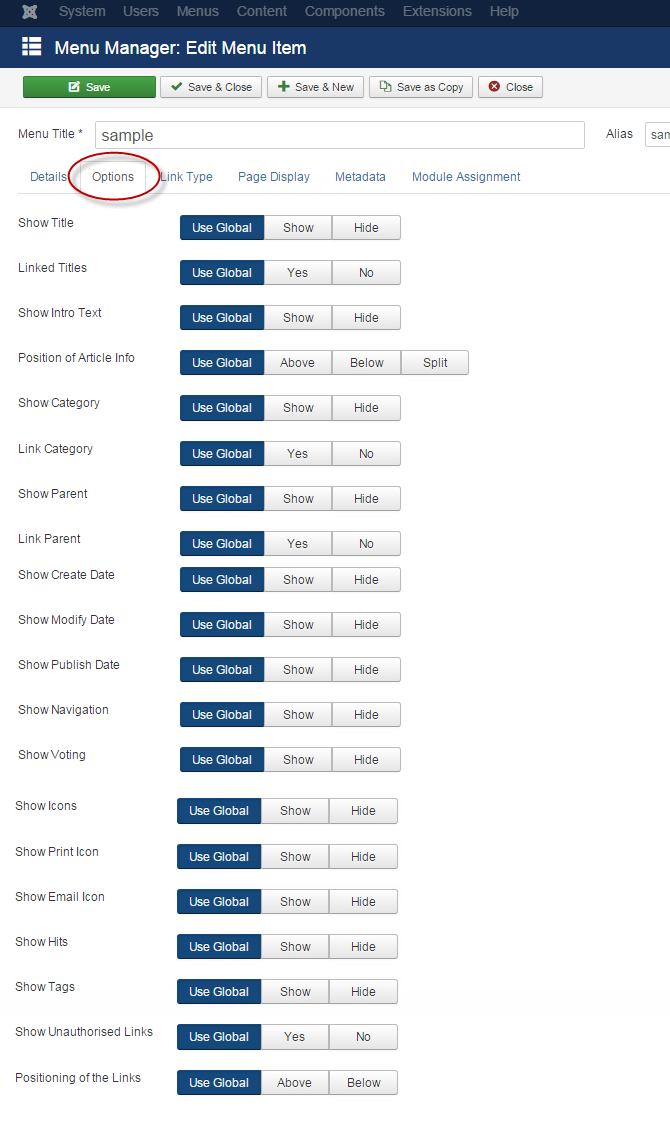
- Now, let's click on the Options tab at the top of the page. Here are more options you can choose for the displaying of your menu item. If you decide to explore all your options, you will find good help in the tool tips that appear when you move your mouse over the labels.
- Click on the tab labeled Link Types
This section will let you customize the way the page containing the article will be displayed. If you decide to explore all your options, you will find good help in the tool tips that appear when you move your mouse over the labels.

- Link Title Attribute - An optional, custom description for the title attribute of the menu hyperlink.
- Link CSS Style - An optional, custom style to apply to the menu hyperlink.
- Link Image - An optional image to be used with the menu hyperlink. The image you would like to associate with the item must be stored in the images/ folder. You can upload your own image using the Media Manager or by FTP.
- Add Menu Title - (Yes/No). If the optional image is added, adds the menu title next to the image. Default is 'Yes'.
- Click on the tab labeled Page Display. You will find good help in the tool tips that appear when you move your mouse over the labels.

- Browser Page Title - If this parameter is left blank, Joomla! will generate a Browser Page Title automatically. This can be used to over-ride the page title set in the article. Don't forget that page titles are one of the most important points when it comes to search engine optimization (SEO)! Use them wisely.
- Show Page Heading - display (Yes) or not (No) the page title set in the previous parameter
- Page Heading - Optional alternative text for the Page heading.
- Page Class - this allows you to generate unique CSS classes for this page. This comes in useful when you would like to change the look of the page to differentiate it from the rest of the site. If you don't need this, simply leave the field empty.
- Click on the tab labeled Metadata. This is where you can customize your meta tags for SEO optimization. You will find good help in the tool tips that appear when you move your mouse over the labels.

- Meta Description - An optional paragraph to be used as the description of the page in the HTML output. This will generally display in the results of search engines.
- Meta Keywords - An optional comma-separated list of keywords and/or phrases to be used in the HTML output.
- Robots - (Use Global/Index, Follow/No index, follow/Index, No follow/No index, no follow). Robots Instructions
- Secure
This is for specifying the SSL security for your page:- On - As a secure page
- Off - As a standard page
- Ignore - Displayed as the other pages - secure or not
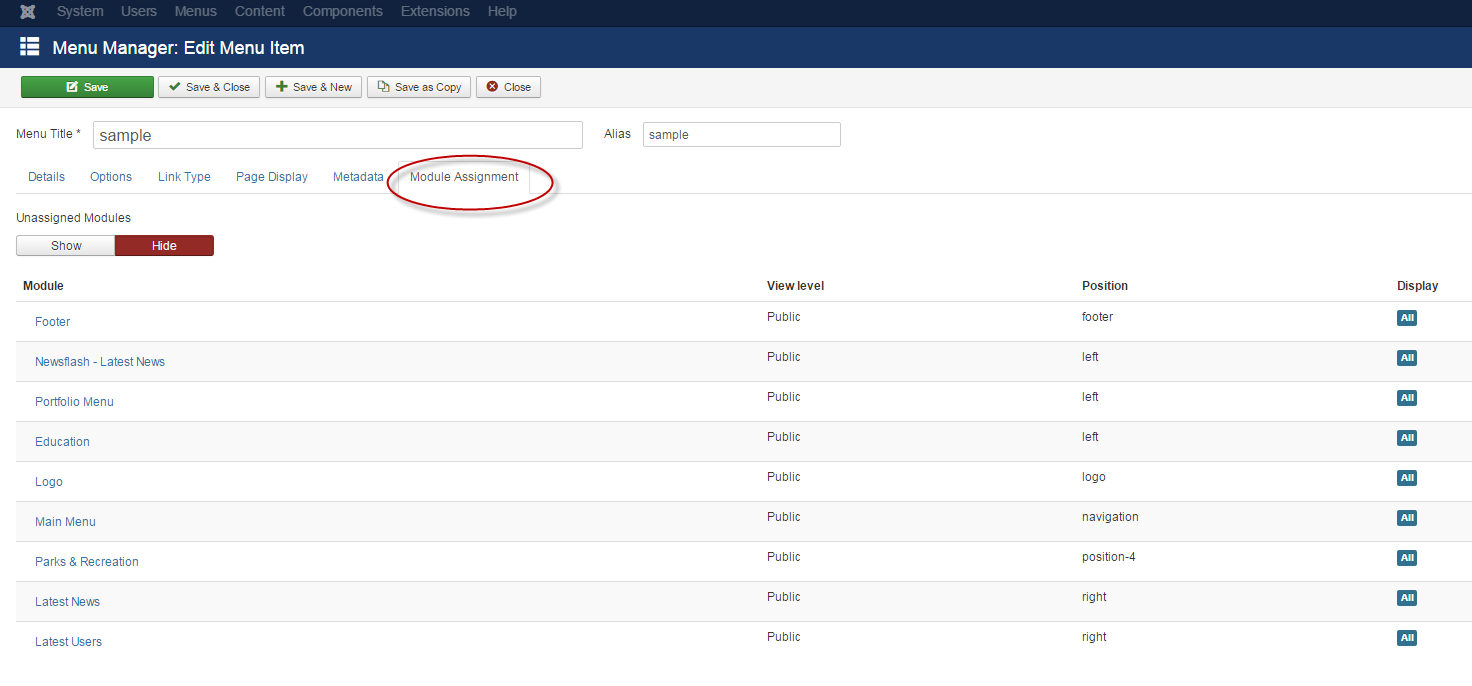
- Click on the tab labeled Module Assignment. In this area, you can make adjustments to modules. Please see this link for specific information on the options available in the Module area. Extensions_Module_Manager_Menu
- Once you are done, click the Save button in the upper-right corner. This will save your work. This will save the new item and place it as the last element (or sub-element, in case of sub-menu items) in the menu. After the first save you can change the item order position within the menu.
The Save and Close button options are described below the image.
- Save - Saves the menu item and stays in the current screen.
- Save & Close - Saves the menu item and closes the current screen.
- Save & New - Saves the menu item and keeps the editing screen open and ready to create another menu item.
- Save as Copy - Saves your changes to a copy of the current menu item. Does not affect the current menu item. This toolbar icon is not shown if you are creating a new menu item.
- Close - Closes the current screen and returns to the previous screen without saving any modifications you may have made.
- Now, go back to the front-end and refresh the page. You should be able to see your new menu item.


Please note that you might need to log in as a registered user or administrator to view the new item. It all depends on the Access Level you have set (see above). When you click the new item, the article will be opened.