Difference between revisions of "Installer"
From Joomla! Documentation
| Line 7: | Line 7: | ||
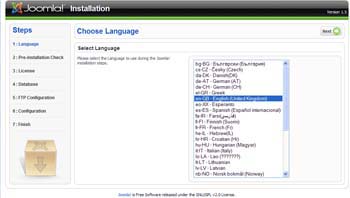
When you enter the address correctly, the image below will appear. Notice how Joomla! has redirected you to the /installation subdirectory. | When you enter the address correctly, the image below will appear. Notice how Joomla! has redirected you to the /installation subdirectory. | ||
| + | |||
[[Image:Installer_Lang.jpg]] | [[Image:Installer_Lang.jpg]] | ||
| + | |||
| + | Click 'Next' and Joomla! takes you to the Pre-Installation Checklist. Here, specific details relating to php settings are outlined. In order to proceed with the installation, all lights must be green. | ||
| + | |||
| + | [[Image:Installer_Precheck.jpg]] | ||
Revision as of 14:21, 20 January 2008
This page has been archived. This page contains information for an unsupported Joomla! version or is no longer relevant. It exists only as a historical reference, it will not be improved and its content may be incomplete and/or contain broken links.
Using the the Joomla! Installer[edit]
Once you've uploaded your files to your hosting space using an FTP client, it's time to install Joomla!.
To begin, open an Internet Browser and type in the address of your joomla installation directory. For example:
yourdomain.com/joomlainstallationdirectoryWhen you enter the address correctly, the image below will appear. Notice how Joomla! has redirected you to the /installation subdirectory.
Click 'Next' and Joomla! takes you to the Pre-Installation Checklist. Here, specific details relating to php settings are outlined. In order to proceed with the installation, all lights must be green.
