Difference between revisions of "Installing Joomla"
From Joomla! Documentation
m (2nd save, continuing to update) |
m (update with file links for images) |
||
| Line 18: | Line 18: | ||
#Move the downloaded Joomla! installation package to the server. Use a [[wikipedia:FTP Client|FTP Client]] to transfer the Joomla! 3.0 files to your server. If you don’t already have an FTP client, we recommend [http://filezilla-project.org/download.php?type=client Filezilla] | #Move the downloaded Joomla! installation package to the server. Use a [[wikipedia:FTP Client|FTP Client]] to transfer the Joomla! 3.0 files to your server. If you don’t already have an FTP client, we recommend [http://filezilla-project.org/download.php?type=client Filezilla] | ||
:: Hint - This can be accomplished by simply moving the downloaded package to your server, then unpacking it. Or you can unpack the files on your local computer, then move the Joomla installation over to your server. Either way, the Joomla installation needs to be unpacked in the root of your site. | :: Hint - This can be accomplished by simply moving the downloaded package to your server, then unpacking it. Or you can unpack the files on your local computer, then move the Joomla installation over to your server. Either way, the Joomla installation needs to be unpacked in the root of your site. | ||
| − | {{warning|If you unpack the files on your own computer, then copy them to your server, be sure to move only the folders and files contained '''INSIDE''' the Joomla! | + | {{warning|If you unpack the files on your own computer, then copy them to your server, be sure to move only the folders and files contained '''INSIDE''' the Joomla! package. If you unpack the folders and files into a folder, for example called, <code>''Joomla''</code> and then upload that folder, your site will have to be accessed at <code>''yoursitename.com/Joomla''</code> instead of <code>''yoursitename.com''</code>.}} |
=== Installation === | === Installation === | ||
| Line 28: | Line 28: | ||
[[File:J30 Installation screen page 2.png]] | [[File:J30 Installation screen page 2.png]] | ||
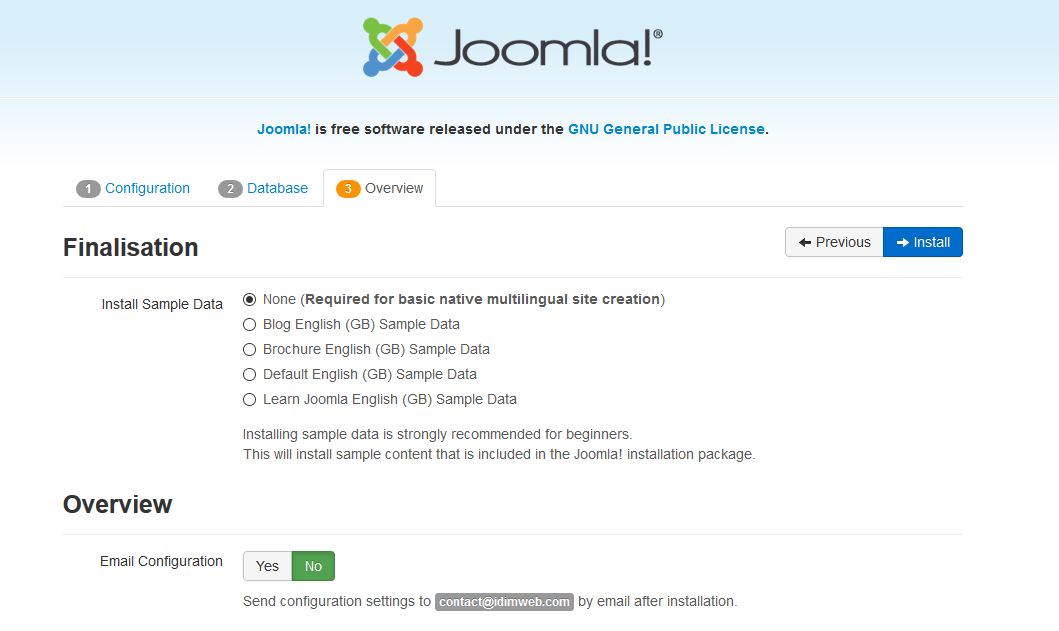
| − | [[File:J30 Installation screen page 3.png]] | + | [[File:J30 Installation screen page 3 top.png]] |
| + | |||
| + | [[File:J30 Installation screen page 3 bottom.png]] | ||
[[File:J30 Installation screen page 4.png]] | [[File:J30 Installation screen page 4.png]] | ||
=== References === | === References === | ||
<references/> | <references/> | ||
Revision as of 01:02, 27 November 2012
This article or section is incomplete, which means it may be lacking information. You are welcome to assist in its completion by editing it as well. If this article or section has not been edited in several days, please consider helping complete the content.
This article was last edited by Tom Hutchison (talk| contribs) 11 years ago. (Purge)
Hosting Requirements[edit]
Installing Joomla! for the first time is very easy. Joomla!’s built-in web installer makes setting up your new site a breeze.
Before we start installing Joomla!, there are a couple prerequisites that need to be met to install Joomla! successfully. These apply whether you have a dedicated server, a shared hosting plan, or are installing a copy on a local computer for testing or development. You’ll need to meet the following requirements below to install and use Joomla! 3.0 ![]()
Downloading and Uploading Joomla! Package Files[edit]
- Download the current release of Joomla! 3.0.x
- Create a database for use with Joomla! You will need to note basic database information needed when the actual Joomla! installation is started.
- Location of datase, localhost? Or a specific host's server such as
dbserver1.yourhost.com - The database name
- The database user's name
- The database user's password
- Location of datase, localhost? Or a specific host's server such as
- Move the downloaded Joomla! installation package to the server. Use a FTP Client to transfer the Joomla! 3.0 files to your server. If you don’t already have an FTP client, we recommend Filezilla
- Hint - This can be accomplished by simply moving the downloaded package to your server, then unpacking it. Or you can unpack the files on your local computer, then move the Joomla installation over to your server. Either way, the Joomla installation needs to be unpacked in the root of your site.
If you unpack the files on your own computer, then copy them to your server, be sure to move only the folders and files contained INSIDE the Joomla! package. If you unpack the folders and files into a folder, for example called, Joomla and then upload that folder, your site will have to be accessed at yoursitename.com/Joomla instead of yoursitename.com.
Installation[edit]
With the above requirements met, a database created and the required Joomla! files in place, you are ready to install Joomla!. Start the Joomla! web installer by browsing to the site's domain name, www.yoursitename.com and you should see:


