تثبيت جوملا
From Joomla! Documentation
تثبيت Joomla! لأول مرة خي عملية سهلة جداً. في Joomla! مثبت ويب مبني يجعل اعداد الموقع الجديد يسير بسهولة.
المتطلبات
متطلبات الاستضافة
قبل البد بتثبيت Joomla!، هناك بضعة متطلبات التي يجب أن تتحقق لتثبيت Joomla! 3.x بنجاح. وتطبق هذه الشروط إذا كان لديك مخدم مخصص، ومخدم خطة استضافة مشتركة، أو تقوم بتثبيت نسخة على الكمبيوتر المحلي للاختبار أو التطوير.
يجب عليك أن تجمع المتطلبات التالية في الأسفل لتثبيت واستخدام Joomla!
المراجع
Recommended PHP.ini Settings
There are some PHP settings that need to be sufficient for Joomla to install. The settings are usually in a "php.ini" or "user.ini". Talk to your host about how to change theses settings if it is possible to do so. If working on a localhost e.g. with XAMPP, you should not be restricted by these settings and VPS or dedicated hosting should also not be as restrictive.
The values for PHP.ini below are suggested values only.
- memory_limit - Minimum: 64M Recommended: 128M or better
- upload_max_filesize - Minimum: 30M
- post_max_size - Minimum: 30M
- max_execution_time: Recommended: 30
التجهيز للتثبيت
يجب عليك اكما مهمتين قبل أن تتمكن من تثبيت Joomla! على مخدمك. أولا، يجب عليك تجميل ملفات حزمة Joomla!. وبعدها، ستحتاج الى قاعدة بيانات لاستخدام Joomla!.
تنزيل ورفع ملفات حزمة Joomla!
حمل الاصدار الحالي من
3.x]
- انقل حزمة تثبيت Joomla! المحملة الى المخدم. استخدم FTP Client لنقل ملفات Joomla! 3.x الى المخدم. هنالك العديد منها للاستخدام ، وهنا تفصيل list of FTP Clients. الرجاء التأكد من أنك تستعمل نسخة رسمية من عميل FTP .
- تلميح - ويمكن تحقيق ذلك ببساطة عن طريق تحريك الحزمة التي تم تحميلها على الخادم الخاص بك، ثم فكها . أو يمكنك فك الملفات على الكمبيوتر المحلي الخاص بك، ثم نقل تركيب جملة لأكثر من الخادم الخاص بك. وفي كلتا الحالتين، يحتاج تركيب جملة الى فردها في جذر موقعك.
The "root" of your site is the public folder where all web page files are stored so that a user can view the site examples include public_html and htdocs. What your Host uses depends on them.
Normally you upload your web files to the root folder. This is typically named "public_html" but other variations include "htdocs" and this depends on what your host has the set up on the server. For Joomla purposes, you can load the files directly into "public_html" or a sub-folder within it.
إذا فردت الملفات على جهاز الكمبيوتر الخاص بك، ثم نسخها إلى المخدم الخاص بك، كن منأكد أنك تنقل فقط المجلدات والملفات الواردة داخل 'حزمة jJoomla . إذا فردت المجلدات والملفات في مجلد، على سبيل المثال يسمى، Joomla وبعدها ارفع ذلك الفهرس، وسوف يتعين الحصول على موقع الويب الخاص بك yoursitename.com/Joomla بدلا من yoursitename.com.
قواعد البيانات لتثبيت Joomla!
- Iإذا كنت بحاجة لإنشاء قاعدة بيانات, الرجاء قراءة "انشاء قاعدة بيانات لاستخدامها مع Joomla!" أولا أو انتقل الى الخطوة #2.
- ستحتاج الى تسجيل المعلومات الأساسية لقاعدة البيانات أنت بحاجة لها عند البدء بتثبيت Joomla!.
- مكان قاعدة البيانات, localhost? أو مخدم استضافة محدد مثل
dbserver1.yourhost.com? - اسم قاعدة البيانات
- اسم مستخدم قاعدة البيانات
- كلمة المرور لمستخدم قاعدة البيانات
- مكان قاعدة البيانات, localhost? أو مخدم استضافة محدد مثل
بد التثبيت
الاعدادات الرئيسية
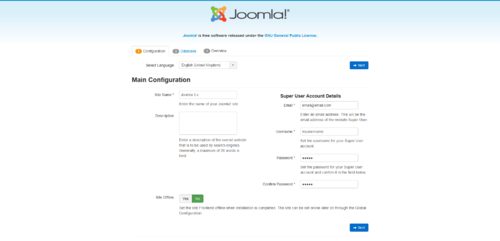
مع اجتماع الشروط المذكورة أعلاه، قاعدة بيانات تم إنشاؤها وملفات Joomla! المطلوبة في مكانها، فأنت على استعداد لتركيب Joomla!. بدء مثبت Joomla! عن طريق فتح المتصفح المفضل لديك وتصفح لاسم نطاق الموقع. على التثبيت المضيف سوف تستخدم http://www.yoursitename.com. إذا كنت تسخدم Joomla!محليا ، ستستخدم http://localhost/<المسار الى ملفات جوملا>, ويجب أن ترى شاشة التثبيت.
ستحاول Joomla! تحديد حقل حدد اللغة بشكل اتوماتيكي من لغى المتصفح الخاص بك . يمكنك تغييرها اذا أردت.
Fill in the following information.
- Site Name: the name of your website — this can be changed at any point later in the Site Global Configuration page.
- Description: enter a description of the website. This is a global fallback meta description used on every page which will be used by search engines. Generally, a maximum of 20 to 25 words is optimal. Again, this can be changed on the Site Global Configuration page at any time. For more on metadata, see Global Metadata Settings and Entering search engine meta-data.
- Admin Email Address: the admin email address. Enter a valid email in case you forget your password. This is the email address where you'll receive a link to change the admin password.
- Admin Username: Joomla! uses a default "admin" as the username for the Super User. You can leave it as is, change it now (which a good Security measure) or use My Profile in the Administration interface to change it later.
- Admin Password: remember that super user has maximum control of the site (frontend & backend), so try to use a difficult password. Use My Profile in the Administration interface to change it later. Confirm the password in the Confirm Admin Password box.
- Site Offline: click the Yes or No box. Yes - this means when installation is complete, your Joomla! website will display the 'Site is offline' message when you browse to
yoursitename.comلعرض الصفحة الرئيسية. لا - وهذا يعني أن الموقع يعمل عند الاستعراض الىyoursitename.comلعرض الصفحة الرئيسية . يمكنك استخدام الاعدادات العامة للموقع في واجهة "الادارة" لتغيير حالة الموفع مغلق في أي وقت.
عندما ينتهي كل شي على الصفحة الأولى، اضغط "'زر التالي'" لتستمر:
Database Configuration
Configuration Settings
You will need to enter the information about the database you will use for Joomla! now. It was suggested to write this information down under "Prepare for Install" tab. You may also read or review Creating a Database for Joomla!.
For simplification, these intructions are a reference to installing with a MySQLi database. The instructions on the installation page are self explanatory, but here they are again:
- Database Type: MySQLi is the common database used
- Hostname Where is your database located? Common is
localhost, but some hosts use a specific database server such asdbserver1.yourhost.com - Username: the username used to connect to the database
- Password: the password for the database's username
- Database Name: the name of the database
- Table Prefix: one is generated automatically, but you can change it. For example,
jos3_can be used. Just don't forget to put the underscore character (_) at the end of the prefix. - Old Database Process: should the installer backup or delete existing tables during the installation of new tables? Click, Yes or No to select the choice.
All these choices can be edited on the Site Global Configuration page, under Server options after the installation is completed. Note, you will break your installation if you change these settings after installation unless you have a complete copy of the current database being used by the Joomla! installation. Common uses would be to update the username and password of the database or to complete a move of an existing installation to a new host with different parameters.
عندما تملأ كافة المعلومات ، اضغط زر التالي للاستمرار
Finalise
Overview
It is now time to finalise the Joomla! installation. The last page of the web browser installation contains all the information about the installation. This includes the options(at the top) for installing sample data and the installation's configurations(at the bottom).
Install Sample Data and Email Configurations
The first options are for automatically installing sample content to the website and emailing the configuration settings.
If you are new to Joomla! it would be beneficial to install some sample data to see how Joomla! works. You can at this time choose to have the configuration settings emailed to you. If the Email Configuration choice is selected, the Email Password choice will appear. The email password is off by default for security. You can choose to have the password included, just click Yes.
Time to check the configurations of your install and the environment of the installation.
Configuration Check
Checking Your Configurations
If everything is in order, you will see the install at the top of the overview page. If not, this is the place to check and see what may be causing an issue.
The section is broken into 4 groups:
- Main Configuration: all the website specific information, such as the website name, description, admin username, etc.
- Database Configuration: contains the information about the database Joomla! will use.
- Pre-Installation Check: these requirements must all be shown as Yes, otherwise you will not be able to install Joomla! With the exception of the PHP Version, the rest are usually controlled in the php.ini. You may need assistance from your host in correcting these settings or checking to see if it is possible to adjust them.
- Typical PHP settings that might cause the install to fail and may need adjusting include the following with suggested values: (1) memory_limit (64M), (2)max_execution_time (30), (3) post_max_size (30M), (4) upload_max_filesize (30M). For more information, see PHP configuration file file.
- Recommended Settings: these are settings are recommended in your PHP configuration, but will not prevent Joomla! from being installed. You can refer to the above instructions on how they may be changed.
If everything is correct and all checks are passed, you may now click the Install button in the top right corner of the Overview page. This will start the actual installation process.
After you click the Install button, you should see a progress bar with additional information of the installation. Once the installation completes, you should see the success page!
Finishing Up
Success and Finishing Up the Installation
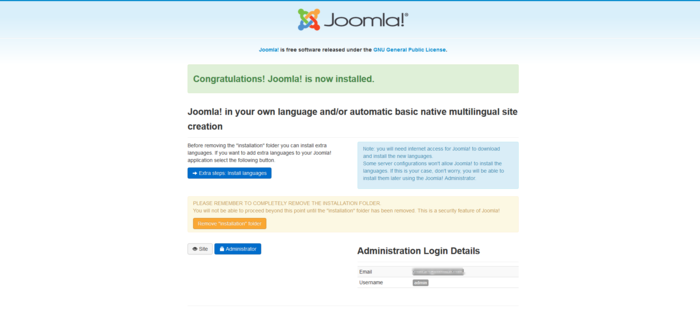
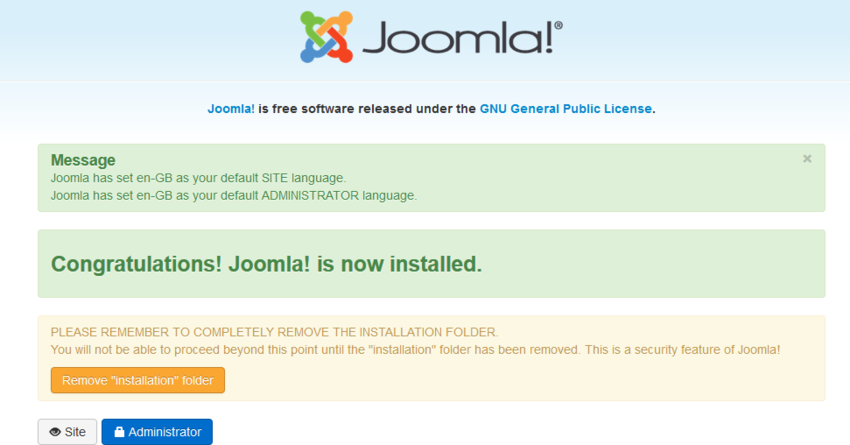
Congratulations! Joomla! 3 is now installed. If you want to start using Joomla! right way without installing extra languages there is one last step to complete the installation. You must delete the Installation Folder. Click on Remove Installation folder and a success message will appear. Now you can navigate to the Administrator log in by clicking Administrator or go right to your site by clicking Site.
تثبيت لغات اضافية
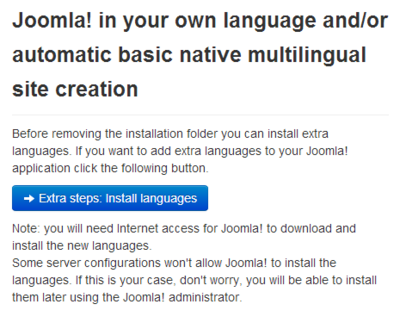
قبل اكمال تثبيتك عن طريق حذف Installation فهرس, اضغط على:
- → خطوات اضافية: تثبيت اللغات
This will continue the installation of Joomla! by taking you to a new installation page.
تثبيت اللغات
تظهر لائحة بحزم اللغة.
اختر اللغة أو حزم اللغة التي ترغب بتثبيتها. تذكر التالي:
- Language packs included in custom distributions will not be listed at this stage as they are already installed.
- A version of the packs proposed will match the Joomla Major version (3.0.x, 3.1.x, etc.). The minor version of the pack may not correspond, e.g. you are installing version 3.3.3 and a 3.3.2 language pack is shown.
- Unmatched language packs in the above example may have untranslated strings.
- The unmatched language packs will be offered as an update when the packs are updated by the registered Translation teams. The available update will be shown in the Control panel as well as in Extensions Manager → Update. This behavior is similar to Extensions Manager → Install Languages.
Click Next and a progress bar will be display while the language pack or packs are downloaded.
اختر اللغة الافتراضية
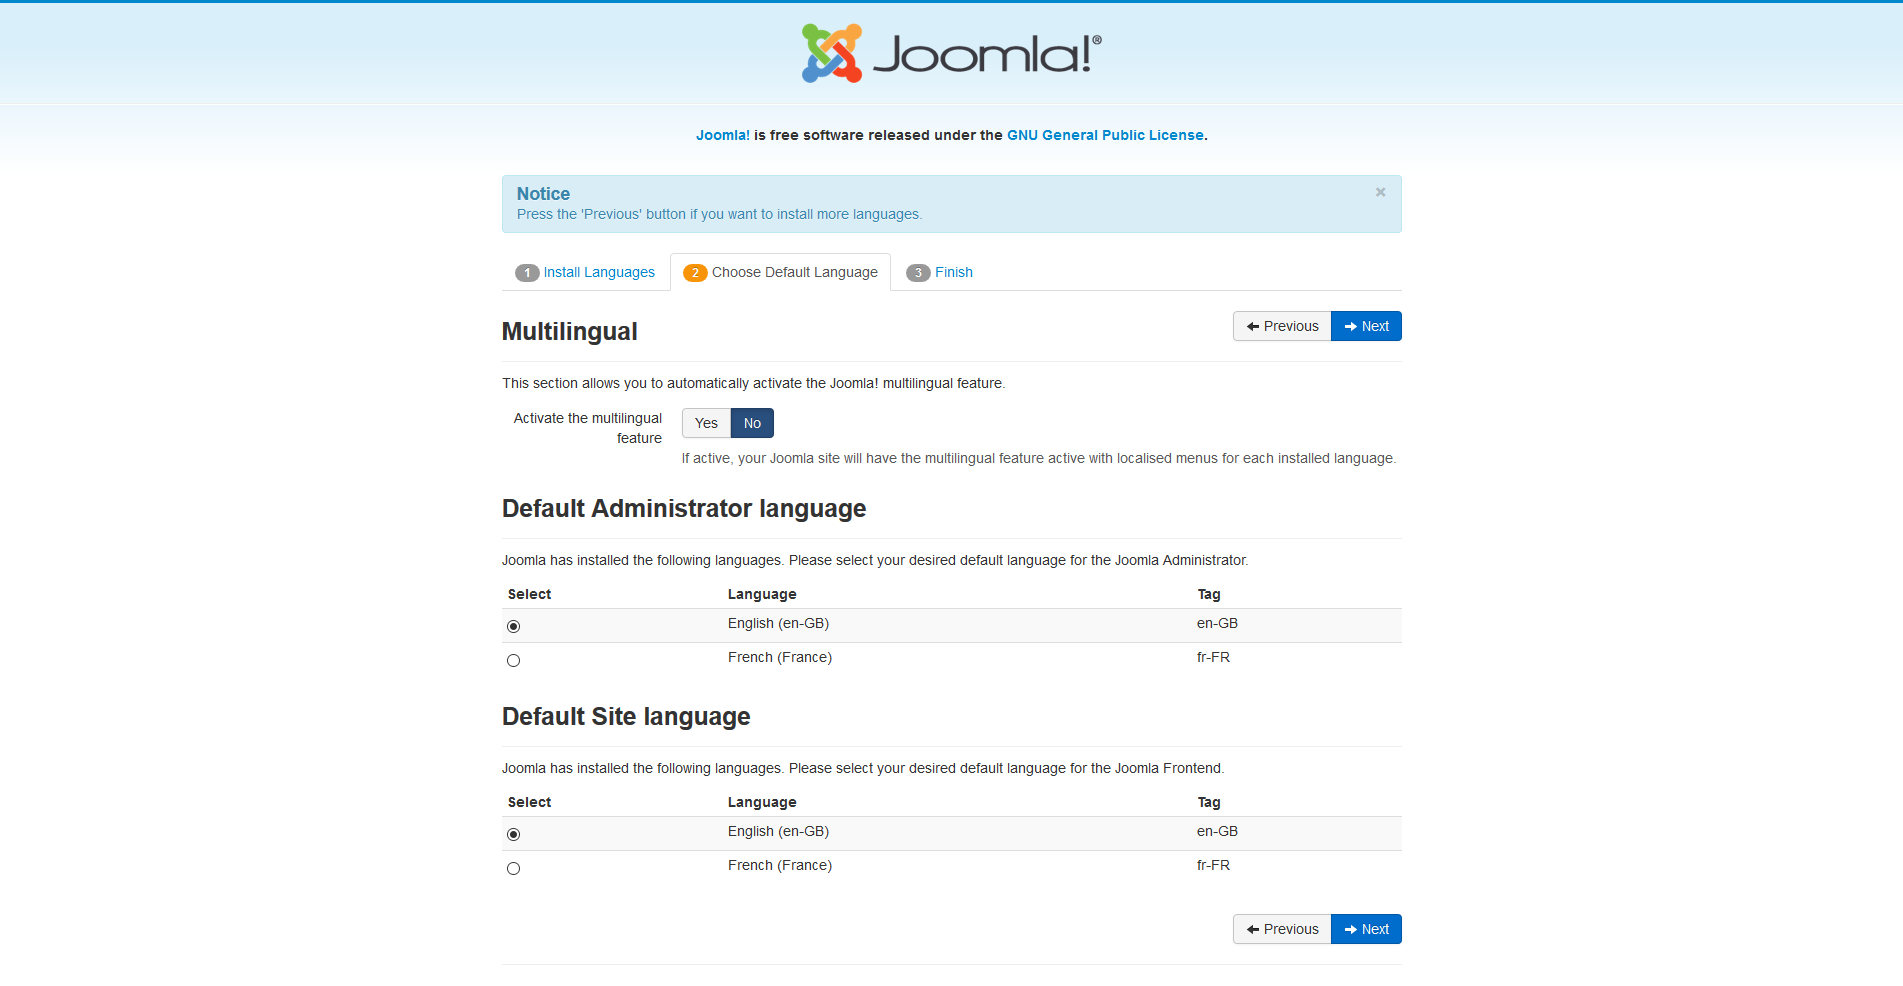
When the download is complete you can choose the default language for the Site and the Administrator interface.
قرر اختيارك للغات الافتراضية.
ربما ترغب باختيار أن تفعل ميزة تعدد اللغات لـ Joomla! في هذا الوقت أيضا.
- Click Yes next to Activate the multilingual feature
- Two additional choice will appear.

- Install localised content, yes or no. This will automatically create one content category for each language installed and one featured article with dummy content for each content category installed.
- Enable the language code plugin, yes or no. If enabled, the plugin will add the ability to change the language code in the generated HTML document to improve SEO.
When you completed all the choices of language installation, click Next to proceed.
Finalise
You will now be presented with a very similar Congratulations! Joomla! is now installed. screen. The difference will be a notation of the default Administrator and Site language settings, if they were set. You will also not see the Extra Steps message in the bottom right.
Now you can delete the Installation Folder. Click on Remove Installation folder and a success message will appear. Now you can navigate to the Administrator log in by clicking Administrator or go right to your site by clicking Site.
