Difference between revisions of "Sandra97/SandBox"
From Joomla! Documentation
< User:Sandra97
m (updates) |
m (→Step 2 - Set up: update) |
||
| Line 49: | Line 49: | ||
====Step 2 - Set up==== | ====Step 2 - Set up==== | ||
| − | Once you have installed the Google Authenticator app on you phone launch it. You will see two choices, manual entry or scan barcode. Pressing manual will require you to enter in the account and key. Scan barcode means you will scan the QR Code | + | Once you have installed the Google Authenticator app on you phone launch it. You will see two choices, manual entry or scan barcode. Pressing manual will require you to enter in the account and key. Scan barcode means you will scan the QR Code on your screen into the mobile app. Scanning will enter all the information automatically. It is also the easiest and safest method for adding your account information. |
[[Image:Joomla-Google-Authenticator-setup-en.png]] | [[Image:Joomla-Google-Authenticator-setup-en.png]] | ||
Revision as of 16:51, 20 August 2015
Joomla! was the first major CMS to implement two factor authentication. This adds a single-use code received on your smartphone or a Yubikey to your existing passwords to make your site extra hacker-proof.
Traditionally, when you want to log in to a website, you have to provide your username and your password in order to identify yourself to the system. The biggest problem with this approach is your username and password can be stolen or guessed. For example, if your computer is infested with malware or you try to access your site from an untrusted network, such as a public WiFi hotspot, it is possible someone could intercept your username and password. This means they can log into your site as you. Because your username and password is compromised, your site can now be hacked.
In order to prevent that, Joomla! 3.2.0 and later versions, come with a built-in Two factor authentication system that secures your site login with a secondary, single use secret code. This is called Two factor Authentication or shortened to 2FA.
Enable Two factor Authentication[edit]
The very first time you’re installing Joomla! 3.2 or higher and access your administration backend, you will see a notice for post-installation messages.
Click on the Review Messages button, you’ll see a screen which indicates that Two factor Authentication is Available.
Click on the Enable Two factor Authentication button.
To set up the Two factor Authentication, go to the User Manager and edit a User. Then go to the Two factor Authentication Tab:
In Joomla! there are two methods are available for Two factor Authentication:
Google Authenticator[edit]
Google Authenticator is an application for smartphones and desktops created by Google which allows you to generate a six digit security password which changes every 30 seconds. In order to log in to your site, you will need to use your username, your password and the six digit security code which changes every thirty seconds.
You can enable Two factor Authentication for the Frontend, the Backend or for Both. This can be set up in the plug-in Two factor Authentication – Google Authenticator.
This provides extra protection against hackers trying to log in to your account. Even if they were able to get a hold of your credentials they have a maximum 30 seconds to hack you site. This is usually not practical for hackers. This is the way Two factor Authentication prevents your site against unauthorized access.
Setting up the Two factor Authentication with the Google Authenticator is actually very easy.
Step 1 – Get Google Authenticator[edit]
Download and Install Google Authenticator on your smartphone or desktop.
Step 2 - Set up[edit]
Once you have installed the Google Authenticator app on you phone launch it. You will see two choices, manual entry or scan barcode. Pressing manual will require you to enter in the account and key. Scan barcode means you will scan the QR Code on your screen into the mobile app. Scanning will enter all the information automatically. It is also the easiest and safest method for adding your account information.
Step 3 - Activate Two factor Authentication[edit]
Go to the Activate Two factor Authenticator field and enter the six digit security code you can see on the screen of your smartphone device. Then click on Save & Close.
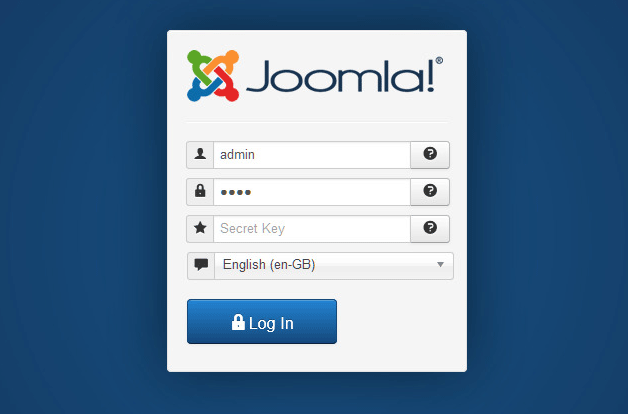
Now, your site access is protected by Two factor Authentication. Log out from your backend, you’ll see that instead of asking for the username and password only, Joomla! is asking for a secret key. The Secret Key is the six digit password you can see on your Google Authenticator screen.
If you don’t enter the secret code or a random one, you will not be able to login. This is what will happen to a hacker who tries to access your administration backend. Since they don’t have the correct secret key and it changes every 30 seconds, you site is more secure.
Yubikey[edit]
This feature allows you to use a Yubikey secure hardware token for two factor authentication. In addition to your username and password you will also need to insert your Yubikey into your computer's USB port, click inside the Secret Key area of the site's login area and touch Yubikey's gold disk. If you have an NFC-equipped Android smartphone you can just approach a compatible Yubikey token (Yubikey Neo) to the NFC reader to copy the secret code to the device's clipboard. The secret code generated by your Yubikey is unique to your device and changes constantly. This provides extra protection against hackers logging in to your account even if they were able to get hold of your password.
You can enable Two factor Authentication for the Frontend, the Backend or for Both. This can be set up in the plug-in Two Factor Authentication – Yubikey.
Contributor[edit]
- Nicholas Dionysopoulos


