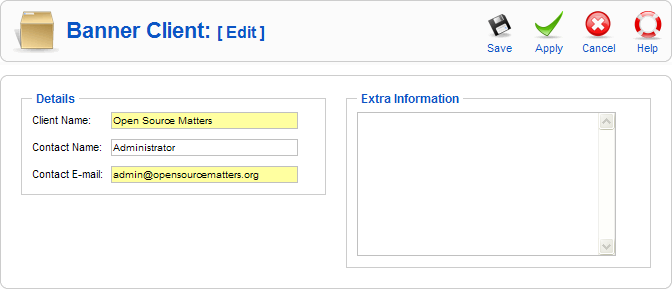
Screen.banners.client.edit.15
From Joomla! Documentation
This article or section is in the process of an expansion or major restructuring. You are welcome to assist in its construction by editing it as well. If this article or section has not been edited in several days, please remove this template.
This article was last edited by Dextercowley (talk| contribs) 16 years ago. (Purge)
How to Access[edit]
Navigate to the the Banner Client Manager. To add a new Banner Client, click on the New icon in the toolbar. To edit an existing Banner Client, click on the Client Name or check the Client's checkbox and press the Edit icon in the toolbar.
Description[edit]
This is where you add a new Banner Client or edit an existing one. Note that you need to create at least one Banner Client before you can create a Banner.
Screenshot[edit]
Details[edit]
- Client Name. The name of the Client. This is the name that will display in the Name column of the Banner Client Manager.
- Contact Name. The name of this Contact.
- Contact E-mail. The e-mail address of this contact.
- Extra Information. Optional field to enter any extra information about this Client.
Toolbar[edit]
At the top right you will see the toolbar:
- Save. Save it and return to editing the menu details.
- Apply. Save it, but stay in the same screen. If you have been working on a screen for a long time and don't want to risk losing your work, pressing Apply saves your work and lets you continue working. If, for example, you lost your Internet connection, your work will be saved up this point.
- Cancel. Go back to the main screen of the Manager, without saving the modifications you made.
- Help. Opens this Help Screen.
Related Information[edit]
- Find and edit existing Banners: Banner Manager
- Add or edit Banner Categories: Banner Category Manager

