Mise à jour CLI (lignes de commande)
From Joomla! Documentation
Documentation
sur les lignes de commande
Introduction
Pour effectuer une tâche mineure dans Joomla!, le tableau de bord de l'administrateur peut sembler fastidieux et lent. La mise à jour de l'application CLI introduit un moyen plus rapide d'effectuer certaines de ces opérations via la ligne de commande. Cela offre un moyen d'intégrer les choses plus rapidement dans l'application Joomla!. Grâce à ce logiciel, les petits tests peuvent être effectués plus rapidement sans passer par le processus du tableau de bord Web. C’est une application CLI pour Joomla! CMS qui permet à l'utilisateur d'effectuer des mises à jour dans le CMS.
Cette documentation montre comment utiliser la mise à jour de l'application CLI et comment étendre ses fonctionnalités en tant que développeur.
Pré-requis
Comme c'est le cas pour toutes les applications CLI (Command Line Interface), l'accès à votre installation Joomla! via la ligne de commande est nécessaire pour utiliser les outils fournis par le CLI Update. Vous devriez peut-être envisager d'avoir un accès SSH pour votre serveur en direct.
Termes et définitions
- CLI - Command Line Interface
- SSH - Secure SHell
Utilisation du CLI Update
In other for you to use the tools provided by CLI Update, as said in former section, you need access to a CLI into the root of the Joomla Installation. In other words you have to be in the root folder of your Joomla CMS as all commands will run from the root folder.
Utilisation des commandes générales
Dans cette section, nous parlerons de l'utilisation des commandes, nous parlerons des différentes commandes, de ce qu'elles sont et comment vous pouvez les utiliser. Nous irons voir les commandes disponibles dans le CLI Update.
Commandes disponibles
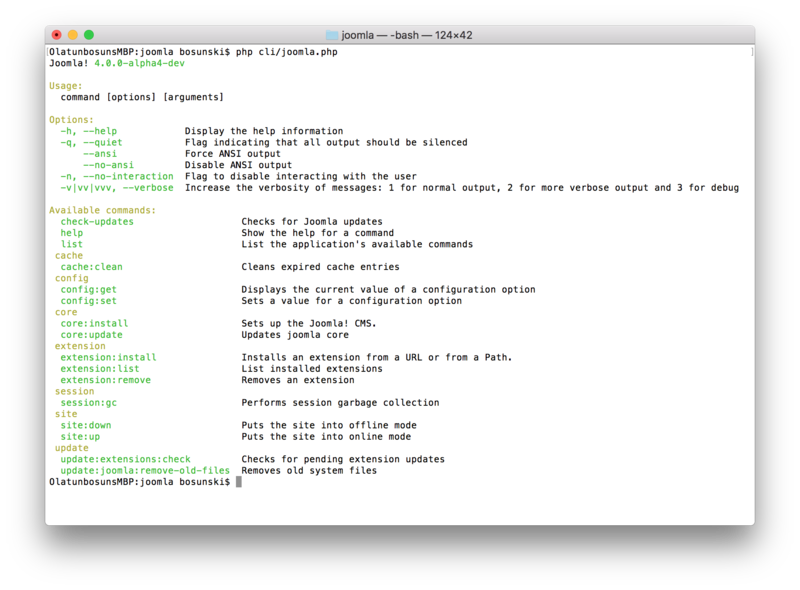
Il y a un certain nombre de commandes disponibles dans le CLI Update qui sont prêtes à l'emploi. Ces commandes sont regroupées en fonction de la zone du CMS Joomla! qu'elles touchent.
Vérification des mises à jour mises à jour
Le CLI Update fournit une commande pour vérifier les mises à jour de Joomla!, elle fonctionne comme la version web de com_joomlaupdate, elle récupère la mise à jour et indique si la mise à jour est disponible ou pas. Pour lancer la vérification de mise à jour, nous allons simplement lancer la commande comme ceci à partir du répertoire racine :
php cli/joomla.php core:check-updates
La commande s'exécute et la sortie affiche une version de mise à jour disponible, si disponible, ou indique que l'installation actuelle est à jour.
Commandes des composants
Le groupe suivant de commandes sont les commandes basées sur l'extension, simplement dit, les commandes nous permettent de gérer les extensions dans le noyau Jommla!, le CLI Update est livré avec des commandes pour installer, lister et supprimer les extensions.
Liste des extensions installées
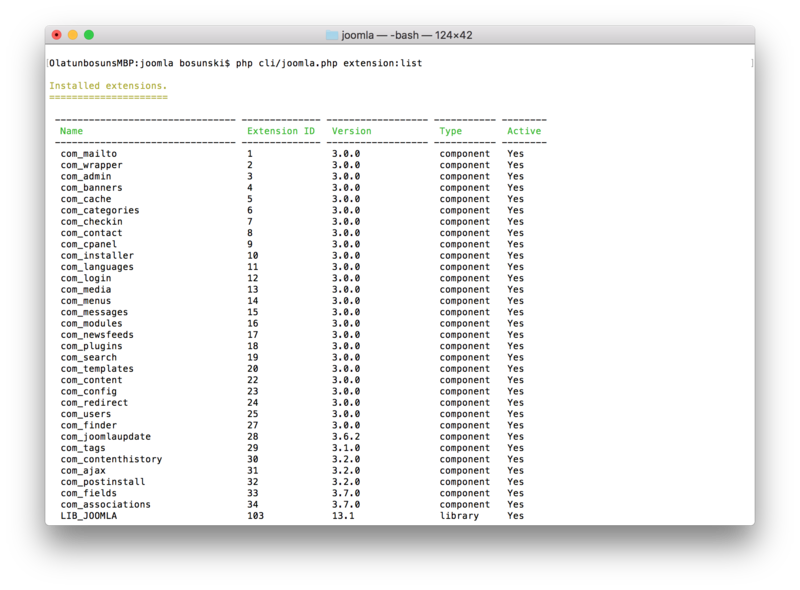
Cette commande nous permet de lister toutes les extensions installées. Cette commande peut s'exécuter de deux manières différentes qui sont :
- "Liste générale" : Liste toutes les extensions installées, par extension cela signifie que les composants, langages, plugins et modules seront listés ensemble lorsque vous lancez cette commande. C'est ainsi que vous appelez la commande :php cli/joomla.php extension:list
- "Listing par types" : La liste générale des extensions peut être fastidieuse si vous recherchez une extension particulière parmi la grande liste, cependant, vous pouvez réduire le nombre en spécifiant le type d'extensions que vous pouvez afficher la commande en ajoutant une option de type à cette commande. Voici comment cela se fait : php cli/joomla.php extension:list --type=language
Ceci listera seulement les extensions basées sur la langue, vous pouvez spécifier le type comme module, plugin et composant.
Installation d'une extension
Joomla fournit l'installation d'une extension par le biais d'une URL vers le fichier zip ou un chemin d'accès au fichier, le CLI Update propose les deux possibilités et la manière de les utiliser est décrite ci-dessous.
- "Installation à partir de l'URL" : Pour installer une extension à partir de l'URL, nous exécuterons la commande comme ceci et fournirons un argument et une option pour la commande extension:installcommande.php cli/joomla.php extension:install url --url=https://github.com/joomla-extensions/patchtester/releases/download/3.0.0-beta3/com_patchtester.zipThis will download the extension com_patchtester.
- Installing from a PATH:To install an extension from a PATH we will run the same extension:install command and specify arguments for paths like this:php cli/joomla.php extension:install --path=/Users/bosunski/docs/com_pathtester.zip
This loads the extension and performs the installation as expected.
Removing an extension
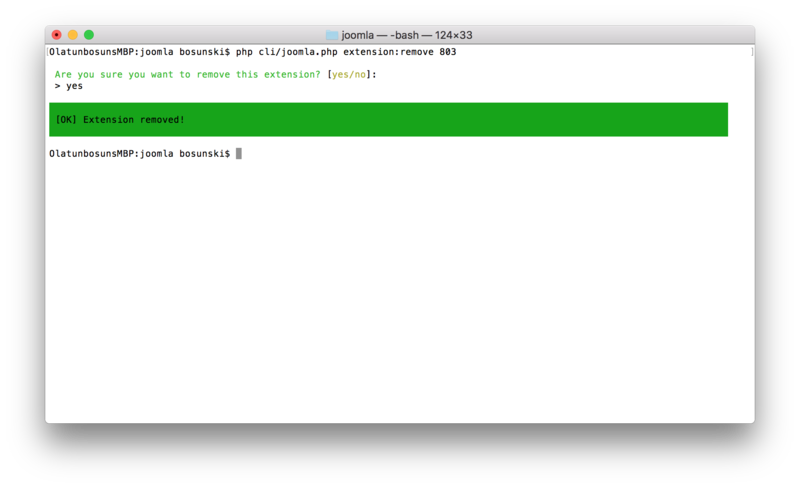
The last command under this category is the extension:remove command that is used to remove extensions from the Joomla CMS. This command takes in the extension_id as an argument, you can always use the extension:list to display extension id. This is how we remove an extension of id 803
php cli/joomla.php extension:remove 803
Updating the Joomla Core
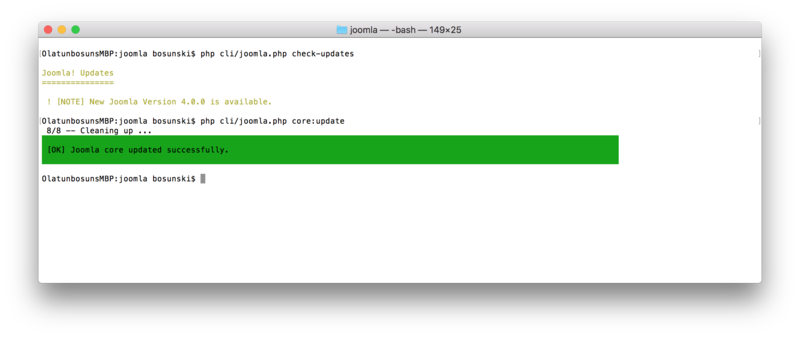
As much as the CLI Update provides a command to check update, it also provides a command to perform the update if an update is available. To perform update we will just run this:
php cli/joomla.php core:update
This command updates the Joomla core updating it to the latest version available.
Installing Joomla! via the CLI
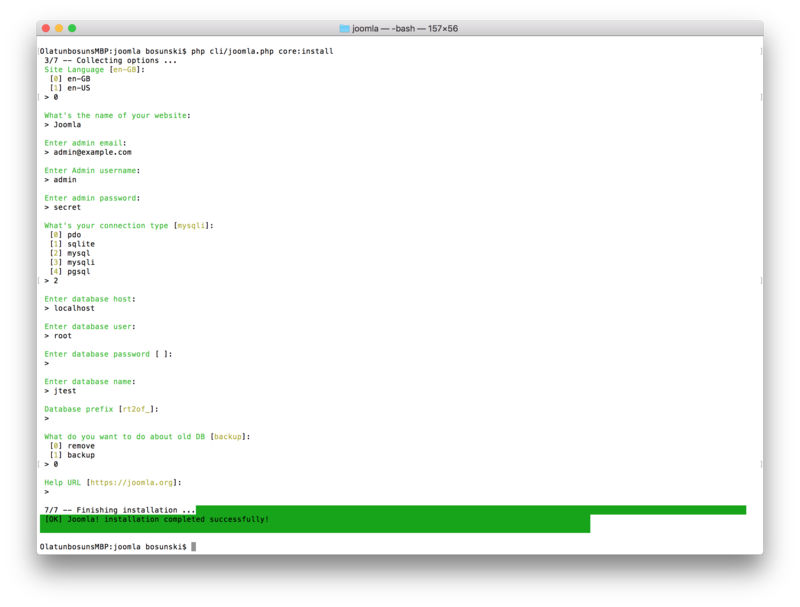
The next command here is the core:install command that lets installation of Joomla CMS to be done via the CLI. This command can work in 2 modes: The Interactive mode and the Non-interactive mode.
Interactive installation
To have a fresh installation of Joomla using the interactive mode we will just run the extension:install command like so:
php cli/joomla.php extension:install
The default installation mode will run and will ask you to input the settings as it's required, once all options have been provided and validated, the installations will run and Joomla will be installed.
Non-interactive Installation
The next type of installation is the Non-interactive mode. In this mode you will not be asked to input the options but rather all options will be specified within a file and the command will take in an option that specifies the path to the file you want to load the options from, it's done like this:
php cli/joomla.php core:install --file=/path/to/config.json
An example of the contents of config.json can be:
{
  "language":"en-GB",
  "site_name":"Joomla",
  "admin_email":"[email protected]",
  "admin_user":"user",
  "admin_password":"password",
  "db_type":"mysql",
  "db_host":"localhost",
  "db_user":"root",
  "db_pass":"xcdxcx",
  "db_name":"jtest",
  "db_prefix":"efs0k_",
  "db_old":"remove",
  "helpurl":"https://joomla.org"
}
OR as sample config.ini
site_name="gsoc"
admin_email="[email protected]"
admin_user="user"
admin_password="secret"
db_type="mysql"
db_host="localhost"
db_user="root"
db_pass=""
db_name="joomla"
db_prefix="prefix_"
The options defined are loaded and validated after which the installation will run.
Configuration based commands
The next set of commands we will be looking at is for setting and viewing configuration options inside the Joomla installation:
Setting configurations
The CLI Update provides a command to change the value of an option existing in the configuration. Using the config:get command you can set any configuration option that exists inside the configuration.php. This is how to use command:
php cli/joomla.php config:set mailer=mail
You can even add multiple option-value pairs like this:
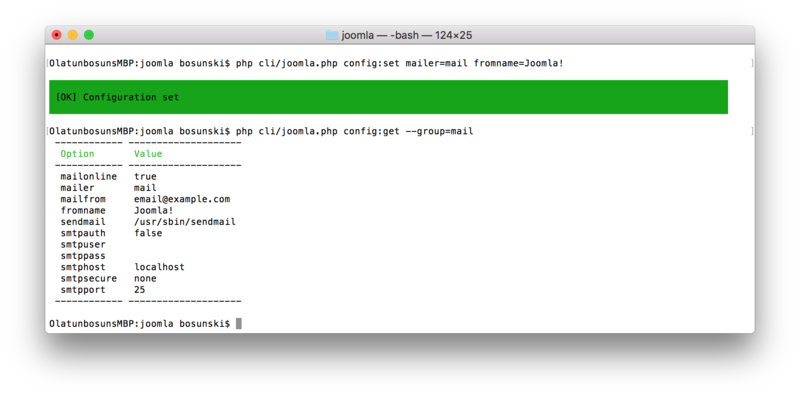
php cli/joomla.php config:set mailer=mail fromname=Joomla! sitename="Joomla Site"
This will set multiple options at once.
Getting configurations
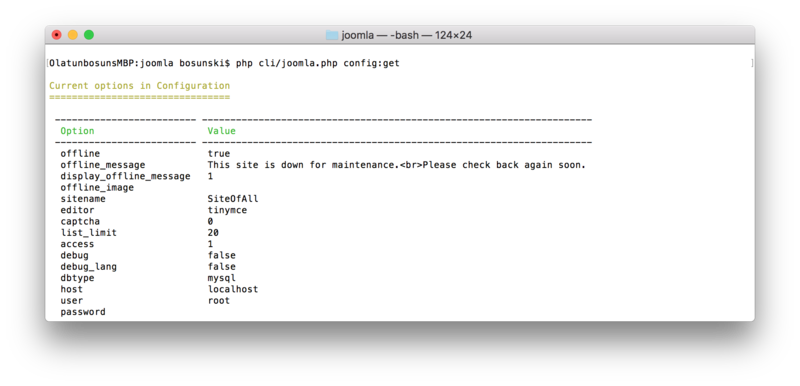
The next command in this category is the config:get command, as the name suggests it gets the value of an option that exists inside the configuration.php, when no argument is supplied to the command, it will display all the options available in a tabulated form. Here is the command:
php cli/joomla.php config:get sitename
This will return the value for the option sitename.
php cli/joomla.php config:get
This will return all the values for the available options.
Getting grouped configurations
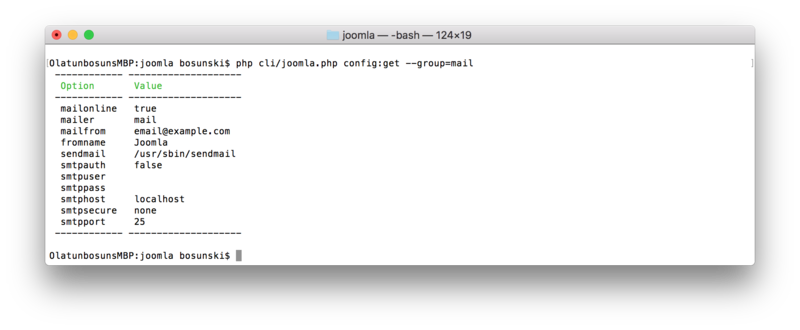
The CLI Update adds an option to config:get command that allows us to get logically grouped options, say for example you want to view all your database related options, or you want to view all email related options. To achieve this the CLI Update provides an option to specify a group of options to display, here is how to do that:
php cli/joomla.php config:get --group=mail
The command takes in the group option and given the value of mail. CLI Update currently supports group values: mail, db and session.
Site down and Site up commands
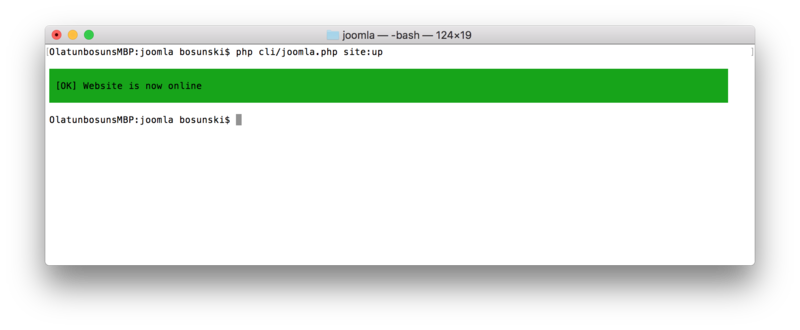
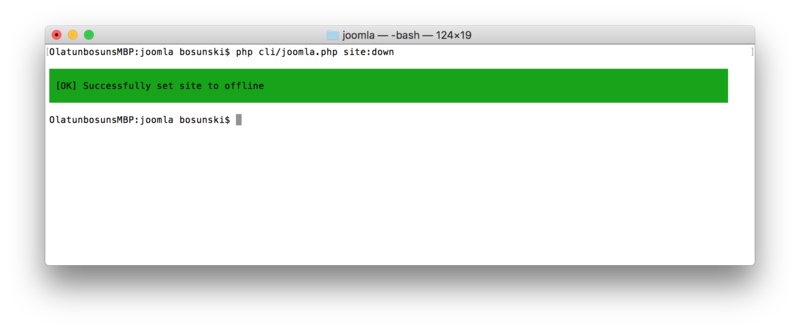
As their name suggests, these commands allow you to quickly put your Joomla powered website into offline or online mode. Here is how to use the commands:
php cli/joomla.php site:up
php cli/joomla.php site:down
The second command puts the website in offline mode while the first command brings the website to online mode.
Contributing to CLI Update as a developer
Adding more commands
The CLI Update ships with some commands which are added based on the need seen as of the time. However, the CLI Update allows other commands to be added easily and this is what this section is for. A video tutorial is included below.
Calling other commands within command classes
Should in case a command you want to write for the CLI Update is going to be require that you call an existing command internally, this is how that can be achieved from within another command class:
<?php
class RunHelloCommand extends AbstractCommand {
    ...

    public function execute(): int {
        $command = $this->getApplication()->getCommand('say:hello');
        $code = $command->execute();

        if($code === 0) {
            // command ran successfully, do something
        }
    }

    ...
}
Here, we're attempting to call the say:hello command created in the Video above.
Some important things to checkout
- Symfony Style Documentation: How to Style a Console Command
- Write a CLI Application with Joomla 4 J4.x:Writing A CLI Application

