Getting Started: Adding an Article
From Joomla! Documentation
Introduction[edit]
You have installed Joomla! but don't have a clue what to do next! Let us assume you are looking at the Home Dashboard. Select the Home Dashboard item in the Administrator menu just to be sure.
There are several ways to create a new article:
- Select the + icon adjacent to Articles in the Home Dashboard Site panel.
- Expand the Content menu and select the + button adjacent to Articles there.
- In either location select the Articles item and in the Articles list screen select the New button the Toolbar.
The Toolbar[edit]
On almost every page, immediately beneath the title bar, is a bar containing action buttons. This is known as the Toolbar. The buttons differ from page to page and sometimes are inactive, appearing grey, until an item is selected in the list of items. Example, containing New, Action, Options and Help buttons:
The Articles Edit Page[edit]
There are a bewildering number of form fields in the Edit page but all except two have sensible defaults that you can forget about for now. The fields to fill in:
- Title. This is compulsory and should be something short and simple.
- Content The article text. This is optional but it would not make much sense to have an article with no content. So start typing. If you just want something to try out copy the following paragraph:
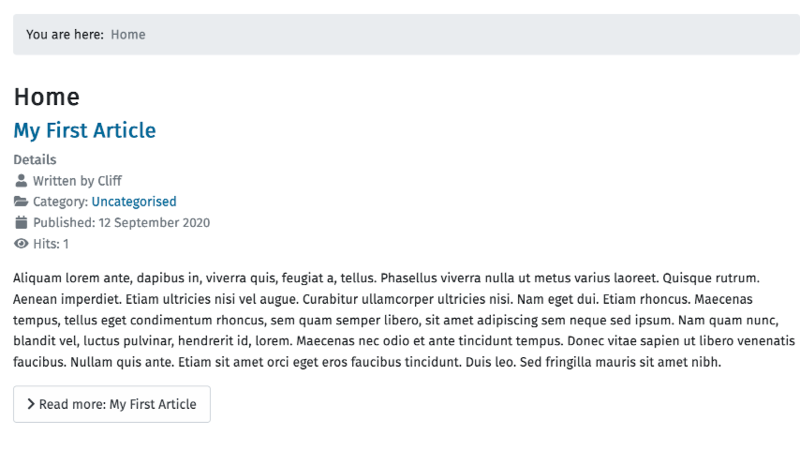
Aliquam lorem ante, dapibus in, viverra quis, feugiat a, tellus. Phasellus viverra nulla ut metus varius laoreet. Quisque rutrum. Aenean imperdiet. Etiam ultricies nisi vel augue. Curabitur ullamcorper ultricies nisi. Nam eget dui. Etiam rhoncus. Maecenas tempus, tellus eget condimentum rhoncus, sem quam semper libero, sit amet adipiscing sem neque sed ipsum. Nam quam nunc, blandit vel, luctus pulvinar, hendrerit id, lorem. Maecenas nec odio et ante tincidunt tempus. Donec vitae sapien ut libero venenatis faucibus. Nullam quis ante. Etiam sit amet orci eget eros faucibus tincidunt. Duis leo. Sed fringilla mauris sit amet nibh.
- Featured. To the right of the edit box (on laptop or bigger screens and below on smaller screens) there is a field to select to make this a Featured article. Select it and then select the Save button in the Toolbar.
Site View[edit]
To see what it looks like you can select the Site view icon in the Title bar. If the site view is already open just reload it.
Note the article metadata: the information between the Title and the Content. You can configure what information appears and where it appears with those other article form fields. Later...
The Read More Break[edit]
If your article is several paragraphs long and you wish to show a number of featured articles on the Home page of your website, you should insert a Read More break after the first paragraph. If you click the Editor CMS Content button you will find it at the bottom of the list. The break appears as a horizontal dashed red line. Here is another paragraph of test text to insert below the page break:
Donec sodales sagittis magna. Sed consequat, leo eget bibendum sodales, augue velit cursus nunc, quis gravida magna mi a libero. Fusce vulputate eleifend sapien. Vestibulum purus quam, scelerisque ut, mollis sed, nonummy id, metus. Nullam accumsan lorem in dui. Cras ultricies mi eu turpis hendrerit fringilla. Vestibulum ante ipsum primis in faucibus orci luctus et ultrices posuere cubilia Curae; In ac dui quis mi consectetuer lacinia. Nam pretium turpis et arcu. Duis arcu tortor, suscipit eget, imperdiet nec, imperdiet iaculis, ipsum. Sed aliquam ultrices mauris. Integer ante arcu, accumsan a, consectetuer eget, posuere ut, mauris.
The result is that only the text before the page break appears on the Home page. Click the Article Title or the Read More button to see the full article on its own.
And notice the Breadcrumbs!

