Adding a new menu
From Joomla! Documentation
Revision as of 07:27, 17 July 2013 by Tom Hutchison (talk | contribs) (→Tutorial: noinclude tags for categories, remove heading)
Revision as of 07:27, 17 July 2013 by Tom Hutchison (talk | contribs) (→Tutorial: noinclude tags for categories, remove heading)
- Log in to the Joomla! Administrator Back-end.
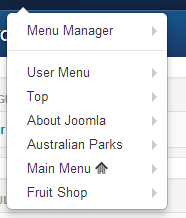
- Click Menus > Menu Manager on the toolbar menu. The Menu Manager screen opens.
- Click the New toolbar button. The New/Edit Menu screen opens.

- Complete the fields as required:

- Unique Name: The identification name used by Joomla! to identify this menu. It must be unique. Spaces are not recommended. This displays under module parameters when editing the module.
- Title: A proper title for the menu. This is used to identify the menu the Menu Manager in the backend.
- Description: A description of the menu, useful for your own reference.
- Module Title: The title that will be given to the mod_mainmenu module in the Module Manager. This will be the published title or name which displays in the front-end (if you tick yes to "show title" in the Module Details when editing the module via the Module Manager). This will only be displayed when creating a new menu. However it can be edited in the Module Manager in the back-end after the module has been created. If left blank, a module will not be created and you will not be able to show this menu in the Front-end.
- Click the Save toolbar button to create the new menu.

- To leave without saving click the Cancel toolbar button.


You can now add new menu items to the newly created menu.
- Note: All new menus default to disabled when first created.