Mettre à jour Joomla! (méthode de mise à jour)
From Joomla! Documentation
C'est non seulement la méthode recommandée, mais également la plus simple pour mettre à jour le CMS Joomla. Cette méthode est parfois appelée Mise à jour en un clic. Si vous ne parvenez pas à utiliser cette méthode du fait de cas d'utilisation spécifique (distributions, langages, vitesse de l'hébergement), vous pouvez mettre à jour le CMS Joomla! en utilisant la méthode d'installation.
- Cette méthode est adaptée pour
- Tous les mises à jours Joomla! 3.x.x à 3.x.x (mise à jur de maintenance)
- Cette méthode n'est pas adaptée pour
- CMS Joomla!3.1.2 à ≥ 3.1.3 - voir Instructions spéciales pour les mises à niveaux de la version 3.1.2
How to Update
Do you need to update your Joomla installation? If an update is available there will be a message indicating an update with a button to press.
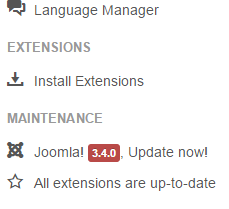
You will also see a notice in the 'left sidebar' at the bottom.
The following are the recommended steps needed to complete an update to your Joomla CMS installation.
Step 1: Backup
Make sure you have a CURRENT BACKUP of your site! In many cases, your host will make periodic site backups. DO NOT rely on these backups! It is STRONGLY RECOMMENDED you preform your own backup.
Step 2: The Update Component
You will need to navigate to the update component. Click the update 'button' or the 'sidebar link' previously shown above or use the main menu, select and click Components → Joomla! Update. You will now see the below image.
Select, 'Write files directly' (default) or 'Write files using FTP' as the method of uploading the new core files to your installation. Did you backup? See Step 1 above.
Step 3: Start the Update
Click the "Install the Update" button and the updating will begin.
When the update has completed, you will see a success notice with the new version.
Joomla Update Configurations
In most cases you will not have to change these settings. The default choices make sure your Joomla CMS installation is always being checked against the correct update server and the appropriate person with administrator access can update the installation.
The options screen is reached by clicking the 'options' button on the main Joomla! Update screen. Once you click the 'options' button, you will see the following image.
Setting Update Server
The update notice you will see on the home administrator depends on the setting of the Update Server and caching.
The first option shows the latest update of the major release in use (default). The second option shows the latest update of the latest major. Caching may cause not detecting an available update and you must purge the cache.


