Installazione di Joomla
From Joomla! Documentation
Installare Joomla! per la prima volta è molto facile. L'installatore web integrato di Joomla! rende l'installazione del vostro nuovo sito un gioco da ragazzi.
Requisiti
Requisiti per l'hosting
Prima di iniziare l'installazione di Joomla!, ci sono un paio di prerequisiti che devono essere soddisfatti per installare Joomla! 3.x con successo. Questi si applicano sia che si disponga di un server dedicato, di un server con piano di hosting condiviso, sia che si stia installando una copia su un computer locale per il test o lo sviluppo.
Per installare e utilizzare Joomla! è necessario soddisfare i seguenti requisiti requisiti
Riferimenti
Impostazioni consigliate di PHP.ini
Ci sono alcune impostazioni PHP che devono essere sufficienti per l'installazione di Joomla. Le impostazioni sono di solito in un "php.ini" o "user.ini". Parlate con il vostro host su come modificare queste impostazioni se è possibile farlo. Se si lavora su un localhost, ad esempio con XAMPP, non si dovrebbe essere limitati da queste impostazioni e anche il VPS o l'hosting dedicato non dovrebbe essere così restrittivo.
I valori per PHP.ini sono solo valori suggeriti.
- memory_limit - Minimum: 64M Recommended: 128M or better
- upload_max_filesize - Minimum: 20M
- post_max_size - Minimum: 20M
- max_execution_time: Recommended: 30
Prepararsi per l'installazione
Prima di poter installare Joomla! sul vostro server dovrete completare due operazioni. In primo luogo, sarà necessario scaricare i file del pacchetto Joomla! Successivamente, sarà necessario disporre di un database per l'utilizzo di Joomla!
Downloading and Uploading Joomla! Package Files
Scarica la versione attuale di
3.x]
- Move the downloaded Joomla! installation package to the server. Use a FTP Client to transfer the Joomla! 3.x files to your server. There are several available for use, here is a detailed list of FTP Clients. Please make sure you are using a FTP client's official release.
- Hint - This can be accomplished by simply moving the downloaded package to your server, then unpacking it. Or you can unpack the files on your local computer, then move the Joomla installation over to your server. Either way, the Joomla installation needs to be unpacked in the root of your site.
The "root" of your site is the public folder where all web page files are stored so that a user can view the site examples include public_html and htdocs. What your Host uses depends on them.
Normally you upload your web files to the root folder. This is typically named "public_html" but other variations include "htdocs" and this depends on what your host has the set up on the server. For Joomla purposes, you can load the files directly into "public_html" or a sub-folder within it.
Se scompattate i file sul vostro computer, poi copiateli sul vostro server, assicuratevi di spostare solo le cartelle e i file contenuti INTERNO del pacchetto Joomla! Se si scompattano le cartelle e i file in una cartella, per esempio chiamata, Joomla e poi caricare quella cartella, il vostro sito dovrà essere accessibile all'indirizzo yoursitename.com/Joomla invece di yoursitename.com.
Database per l'installazione di Joomla!
- If you need to create a database, please read "Create a database for use with Joomla!" first or skip to step #2.
- You will need to note basic database information needed when the actual Joomla! installation is started.
- Location of database, localhost? Or a specific host's server such as
dbserver1.yourhost.com? - The database name
- The database user's name
- The database user's password
- Location of database, localhost? Or a specific host's server such as
Avvia l'installazione
Configurazione principale
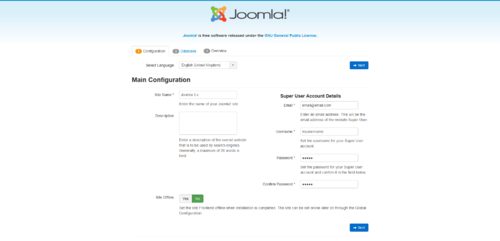
Con i requisiti di cui sopra soddisfatti, un database creato e i file di Joomla! necessari, si è pronti per installare Joomla! Avviare il programma di installazione di Joomla! web aprendo il browser preferito e navigando sul nome di dominio del sito. Per l'installazione dell'host si utilizzerà http://www.yoursitename.com. If your are installing Joomla! locally, you will use http://localhost/<path to Joomla files>, and you should see the installation screen.
Joomla! will try to identify the Select Language field automatically from your browser's language. You can change this if needed.
Fill in the following information.
- Site Name: the name of your website — this can be changed at any point later in the Site Global Configuration page.
- Description: enter a description of the website. This is a global fallback meta description used on every page which will be used by search engines. Generally, a maximum of 20 to 25 words is optimal. Again, this can be changed on the Site Global Configuration page at any time. For more on metadata, see Global Metadata Settings and Entering search engine meta-data.
- Admin Email Address: the admin email address. Enter a valid email in case you forget your password. This is the email address where you'll receive a link to change the admin password.
- Admin Username: Joomla! uses a default "admin" as the username for the Super User. You can leave it as is, change it now (which a good Security measure) or use My Profile in the Administration interface to change it later.
- Admin Password: remember that super user has maximum control of the site (frontend & backend), so try to use a difficult password. Use My Profile in the Administration interface to change it later. Confirm the password in the Confirm Admin Password box.
- Site Offline: click the Yes or No box. Yes - this means when installation is complete, your Joomla! website will display the 'Site is offline' message when you browse to
yoursitename.comto view the home page. No - this means the site is live when you browse toyoursitename.comto view the home page. You can use the Site Global Configuration in the Administration interface to change the Offline status at any time.
When everything on the first page is completed, click the next button to proceed:
Configurazione del database
Impostazioni di configurazione
Dovrai inserire subito le informazioni sul database che userai per Joomla! È stato suggerito di scrivere queste informazioni sotto la scheda "Preparare per l'installazione". Creating a Database for Joomla!.
For simplification, these intructions are a reference to installing with a MySQLi database. The instructions on the installation page are self explanatory, but here they are again:
- Database Type: MySQLi is the common database used
- Hostname Where is your database located? Common is
localhost, but some hosts use a specific database server such asdbserver1.yourhost.com - Username: the username used to connect to the database
- Password: the password for the database's username
- Database Name: the name of the database
- Table Prefix: one is generated automatically, but you can change it. For example,
jos3_can be used. Just don't forget to put the underscore character (_) at the end of the prefix. - Old Database Process: should the installer backup or delete existing tables during the installation of new tables? Click, Yes or No to select the choice.
All these choices can be edited on the Site Global Configuration page, under Server options after the installation is completed. Note, you will break your installation if you change these settings after installation unless you have a complete copy of the current database being used by the Joomla! installation. Common uses would be to update the username and password of the database or to complete a move of an existing installation to a new host with different parameters.
When all the information has been filled in, click the next button to proceed:
Finalise
Overview
It is now time to finalise the Joomla! installation. The last page of the web browser installation contains all the information about the installation. This includes the options(at the top) for installing sample data and the installation's configurations(at the bottom).
Install Sample Data and Email Configurations
The first options are for automatically installing sample content to the website and emailing the configuration settings.
If you are new to Joomla! it would be beneficial to install some sample data to see how Joomla! works. You can at this time choose to have the configuration settings emailed to you. If the Email Configuration choice is selected, the Email Password choice will appear. The email password is off by default for security. You can choose to have the password included, just click Yes.
Time to check the configurations of your install and the environment of the installation.
Controllo della configurazione
Controllo delle configurazioni
Se tutto è in ordine, vedrete l'installazione nella parte superiore della pagina di panoramica. In caso contrario, questo è il luogo dove controllare e vedere cosa può causare un problema.
The section is broken into 4 groups:
- Main Configuration: all the website specific information, such as the website name, description, admin username, etc.
- Database Configuration: contains the information about the database Joomla! will use.
- Pre-Installation Check: these requirements must all be shown as Yes, otherwise you will not be able to install Joomla! With the exception of the PHP Version, the rest are usually controlled in the php.ini. You may need assistance from your host in correcting these settings or checking to see if it is possible to adjust them.
- Typical PHP settings that might cause the install to fail and may need adjusting include the following with suggested values: (1) memory_limit (64M), (2)max_execution_time (30), (3) post_max_size (30M), (4) upload_max_filesize (30M). For more information, see PHP configuration file file.
- Recommended Settings: these are settings are recommended in your PHP configuration, but will not prevent Joomla! from being installed. You can refer to the above instructions on how they may be changed.
If everything is correct and all checks are passed, you may now click the Install button in the top right corner of the Overview page. This will start the actual installation process.
After you click the Install button, you should see a progress bar with additional information of the installation. Once the installation completes, you should see the success page!
Finishing Up
Success and Finishing Up the Installation
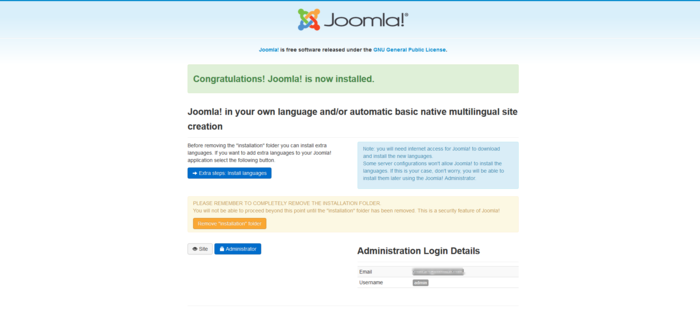
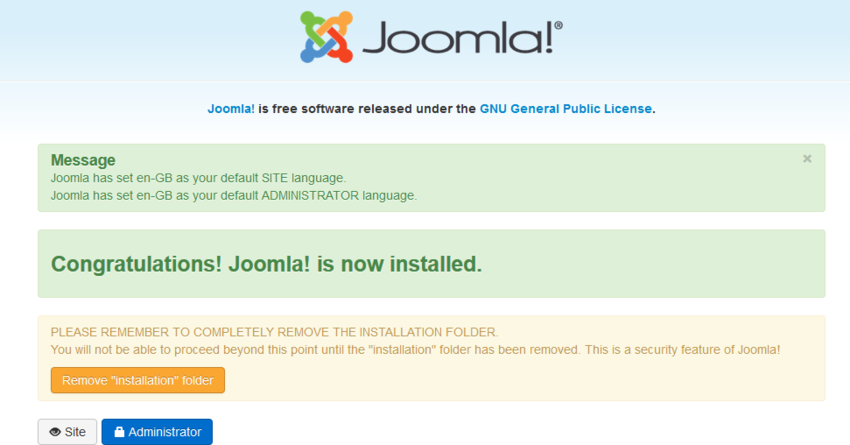
Congratulations! Joomla! 3 is now installed. If you want to start using Joomla! right way without installing extra languages there is one last step to complete the installation. You must delete the Installation Folder. Click on Remove Installation folder and a success message will appear. Now you can navigate to the Administrator log in by clicking Administrator or go right to your site by clicking Site.
Installazione di lingue extra
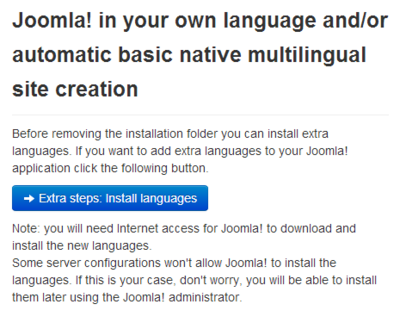
Prima di completare l'installazione cancellando la Cartella di installazione, cliccate su:
- → Passi extra: Installare le lingue
Questo continuerà l'installazione di Joomla! portandovi in una nuova pagina di installazione.
Installare le lingue
Viene visualizzato un elenco di pacchetti di lingue.
Controllare la lingua o i pacchetti linguistici che si desidera installare. Ricordate quanto segue:
- Language packs included in custom distributions will not be listed at this stage as they are already installed.
- A version of the packs proposed will match the Joomla Major version (3.0.x, 3.1.x, etc.). The minor version of the pack may not correspond, e.g. you are installing version 3.3.3 and a 3.3.2 language pack is shown.
- Unmatched language packs in the above example may have untranslated strings.
- The unmatched language packs will be offered as an update when the packs are updated by the registered Translation teams. The available update will be shown in the Control panel as well as in Extensions Manager → Update. This behavior is similar to Extensions Manager → Install Languages.
Fare clic su Avanti e verrà visualizzata una barra di avanzamento mentre il pacchetto o i pacchetti di lingua vengono scaricati.
Scegli la lingua predefinita
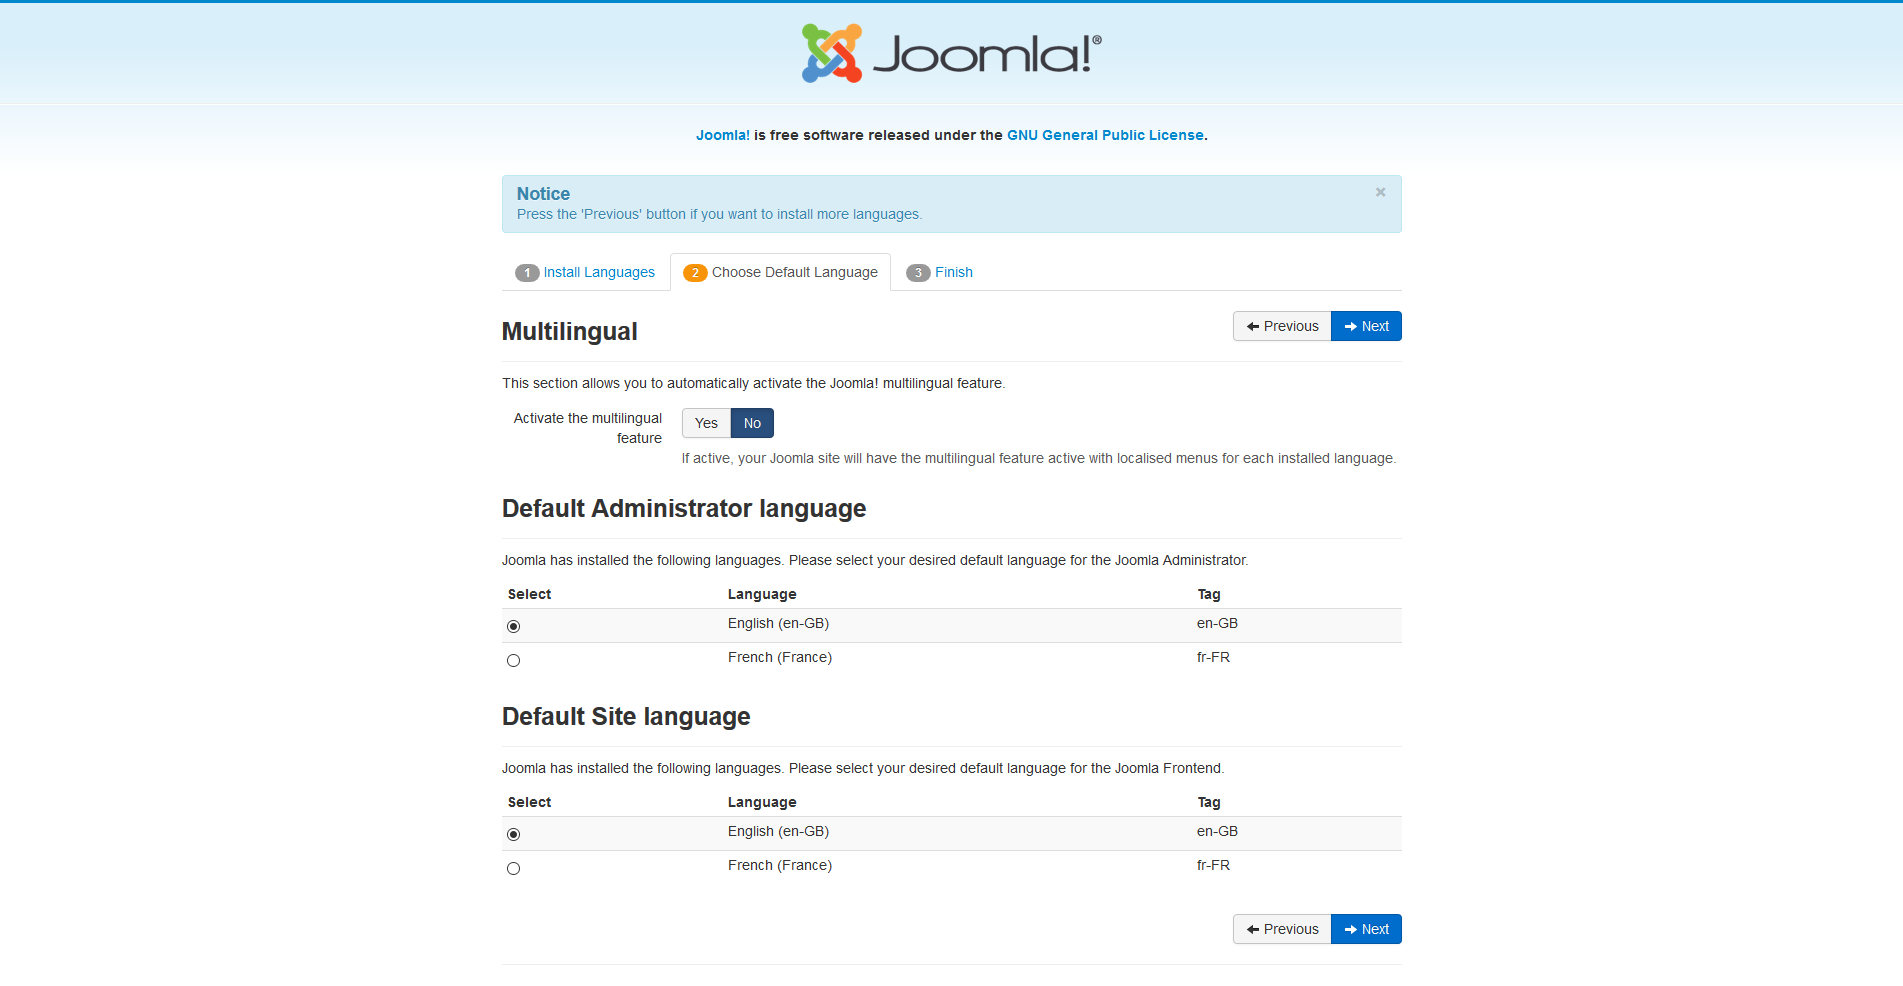
Al termine del download è possibile scegliere la lingua predefinita per il sito e l'interfaccia dell'amministratore.
Potete anche scegliere di attivare le funzioni multilingue di Joomla! anche in questo momento.
- Clicca Sì accanto a Attivare la funzione multilingue.
- Appariranno due scelte aggiuntive.

- Installare contenuti localizzati, sì o no. Questo creerà automaticamente una categoria di contenuti per ogni lingua installata e un articolo con contenuti fittizi per ogni categoria di contenuti installata.
- Abilita il plugin del codice lingua, sì o no. Se abilitato, il plugin aggiungerà la possibilità di modificare il codice della lingua nel documento HTML generato per migliorare il SEO.
Una volta completate tutte le scelte di installazione della lingua, fare clic su Avanti per procedere.
Finalizza
Ora vi verrà presentato un Congratulazioni! Joomla! è ora installato. La differenza sarà una notazione delle impostazioni di default dell'amministratore e della lingua del sito, se sono state impostate. Inoltre non vedrete il messaggio Extra Steps in basso a destra.
Ora è possibile cancellare la Cartella di installazione. Cliccare su Rimuovi cartella di installazione e apparirà un messaggio di successo. Ora potete navigare fino al Administrator di accesso cliccando su Administrator o andare direttamente al vostro sito cliccando su Site.
