安装Joomla!3
From Joomla! Documentation
Revision as of 10:48, 3 May 2016 by Guozhanfeng (talk | contribs) (Created page with "去显示前台首页. 你在任何时间使用Site Global Configuration ''管理后台''界面去设置改变这种设置")
首先,安装Joomla!非常简单. Joomla!内置的Web安装向导指导你几步完成安装。
配置要求
主机要求
我们开始安装Joomla!之前, 有几个先决条件需要满足才能顺利完成安装Joomla ! 3.x. 你可能是租用了虚拟主机,或是vps服务器(包括国内阿里云服务器),也有可能是你自己的本地环境进行搭建。检查这些软件环境是否满足安装需要。(如有问题可以与六艺Joomla人员联系)
你需要下面的环境配置才能安装并使用Joomla! ![]()
引用
开始前,你需要先下载Joomla安装文件,然后分配一个Mysql数据给它。
下载或升级Joomla!文件包
- 下载最新版 Joomla! 3.x
- 将下载的安装包上传到服务器上.可以使用 FTP 客户端软件 去上传Joomla! 3.x 文件. 其他上传软件还包括 FTP 客户端列表.请选择一个你习惯的软件即可。
- 提示—这可以通过简单的下载包(一般为一个zip文件)将其转移到您的服务器,然后将其解压缩, 无论采取什么方式,重要的是你要将其放在正确的位置(比如服务器的html/下面 或www/下面,具体请咨询你的服务器提供商)
如果你解压缩,请确保加压缩后的文件夹及文件存放在html/或www/下面,而不是又嵌套一层文件夹,类似于这样: Joomla 然后上传文件夹,你的网站将会在访问 yoursitename.com/Joomla 而不是 yoursitename.com.
为Joomla安装准备数据库
- 如果你不知道如何创建一个数据库,首先请阅读"为Joomla创建一个数据库" 或跳到第#2.步
- 填写你的数据库信息。(六艺提示:1如果你输入的数据库信息错误,会收到错误提示“无法连接到数据库”。如果你使用root用户进行操作,可以不用提前创建数据库,在安装过程中会自动创建)
- 数据库的位置, 本地填写localhost 或者远程数据库服务器
dbserver1.yourhost.com?根据你的运营商提供的数据信息填写 - 数据库名称
- 用户名
- 数据库密码
- 数据库的位置, 本地填写localhost 或者远程数据库服务器
开始安装
主要配置
准备安装Joomla !。通过浏览器打开你刚刚设定的的主机网址,启动Joomla !安装程序,主机安装使用 http://www.yoursitename.com. 如果你在本地电脑上面安装Joomla!你将使用 http://localhost/<Joomla文件路径>, 你应该看到安装向导界面.

Joomla!将自动判断你的计算机语言,你也可以通过 Select Language选择一种你希望的语言。
填写以下信息
- Site Name: 为你的网站起一个响亮的名字(当然以后可以修改)Site Global Configuration .
- Description: 输入网站说明. 这是一个“全局设置”述用于每个页面,主要是用户SEO的meta标签部分。一般来说,40字以内比较合适。可以空着,安装以后可以在站点全局设置 页面进行修改. 更多Meta设置说明可访问全局meta设置 和 搜索引擎 meta-data.
- Admin Email Address: 网站管理员邮箱. 输入一个有效的电子邮件,当你忘记你的密码可以帮你找回密码。
- Admin Username: Joomla! 3之前版本默认 "admin"作为超级管理员用户 (为了网站安全,六艺建议你设置其他用户名作为超级用户,而不使用admin) (选择一个好的安全措施) 或使用My Profile 在 Administration 界面去修改它.
- Admin Password: 为你的超级管理员账户设定密码 (frontend & backend), 虽然没有强制要求密码复杂程度,六艺建议尽量使用复杂一些的密码. 稍后可以在My Profile Administration 界面去重新设置它. 再次确认一遍你的密码 Confirm Admin Password
- Site Offline: 如果你设置了此项,当打开网站前台时会提示“网站关闭”状态,作为管理员可通过密码正常访问前台页面。(不建议初学者设定offline)
yoursitename.com去访问前台首页.yoursitename.com去显示前台首页. 你在任何时间使用Site Global Configuration 管理后台界面去设置改变这种设置
When everything on the first page is completed, click the next button to proceed:
Database Configuration
Configuration Settings
You will need to enter the information about the database you will use for Joomla! now. It was suggested to write this information down under "Prepare for Install" tab. You may also read or review Creating a Database for Joomla!.

For simplification, these intructions are a reference to installing with a MySQLi database. The instructions on the installation page are self explanatory, but here they are again:
- Database Type: MySQLi is the common database used
- Hostname Where is your database located? Common is
localhost, but some hosts use a specific database server such asdbserver1.yourhost.com - Username: the username used to connect to the database
- Password: the password for the database's username
- Database Name: the name of the database
- Table Prefix: one is generated automatically, but you can change it. For example,
jos3_can be used. Just don't forget to put the underscore character (_) at the end of the prefix. - Old Database Process: should the installer backup or delete existing tables during the installation of new tables? Click, Yes or No to select the choice.
All these choices can be edited on the Site Global Configuration page, under Server options after the installation is completed. Note, you will break your installation if you change these settings after installation unless you have a complete copy of the current database being used by the Joomla! installation. Common uses would be to update the username and password of the database or to complete a move of an existing installation to a new host with different parameters.
When all the information has been filled in, click the next button to proceed:
Finalise
Overview
It is now time to finalise the Joomla! installation. The last page of the web browser installation contains all the information about the installation. This includes the options(at the top) for installing sample data and the installation's configurations(at the bottom).
Install Sample Data and Email Configurations
The first options are for automatically installing sample content to the website and emailing the configuration settings.

If you are new to Joomla! it would be beneficial to install some sample data to see how Joomla! works. You can at this time choose to have the configuration settings emailed to you. If the Email Configuration choice is selected, the Email Password choice will appear. The email password is off by default for security. You can choose to have the password included, just click Yes.
Time to check the configurations of your install and the environment of the installation.
Configuration Check
Checking Your Configurations
If everything is in order, you will see the install at the top of the overview page. If not, this is the place to check and see what may be causing an issue.

The section is broken into 4 groups:
- Main Configuration: all the website specific information, such as the website name, description, admin username, etc.
- Database Configuration: contains the information about the database Joomla! will use.
- Pre-Installation Check: these requirements must all be shown as Yes, otherwise you will not be able to install Joomla! With the exception of the PHP Version, the rest are usually controlled in the php.ini. You may need assistance from your host in correcting these settings or checking to see if it is possible to adjust them. For more information, see PHP configuration file file.
- Recommended Settings: these are settings are recommended in your PHP configuration, but will not prevent Joomla! from being installed. You can refer to the above instructions on how they may be changed.
If everything is correct and all checks are passed, you may now click the Install button in the top right corner of the Overview page. This will start the actual installation process.
After you click the Install button, you should see a progress bar with additional information of the installation. Once the installation completes, you should see the success page!
Finishing Up
Success and Finishing Up the Installation
Congratulations! Joomla! 3 is now installed. If you want to start using Joomla! right way without installing extra languages there is one last step to complete the installation. You must delete the Installation Folder. Click on Remove Installation folder and a success message will appear. Now you can navigate to the Administrator log in by clicking Administrator or go right to your site by clicking Site.

Installing Extra Languages

Before you complete your installation by deleting the Installation Folder, click on:
- → Extra steps: Install languages
This will continue the installation of Joomla! by taking you to a new installation page.
Install Languages
A list of language packs is displayed.

Check the language or language packs you wish to install. Remember the following:
- Language packs included in custom distributions will not be listed at this stage as they are already installed.
- A version of the packs proposed will match the Joomla Major version (3.0.x, 3.1.x, etc.). The minor version of the pack may not correspond, e.g. you are installing version 3.3.3 and a 3.3.2 language pack is shown.
- Unmatched language packs in the above example may have untranslated strings.
- The unmatched language packs will be offered as an update when the packs are updated by the registered Translation teams. The available update will be shown in the Control panel as well as in Extensions Manager → Update. This behavior is similar to Extensions Manager → Install Languages.
Click Next and a progress bar will be display while the language pack or packs are downloaded.
Choose Default Language
When the download is complete you can choose the default language for the Site and the Administrator interface.
- Make your choices for default languages.
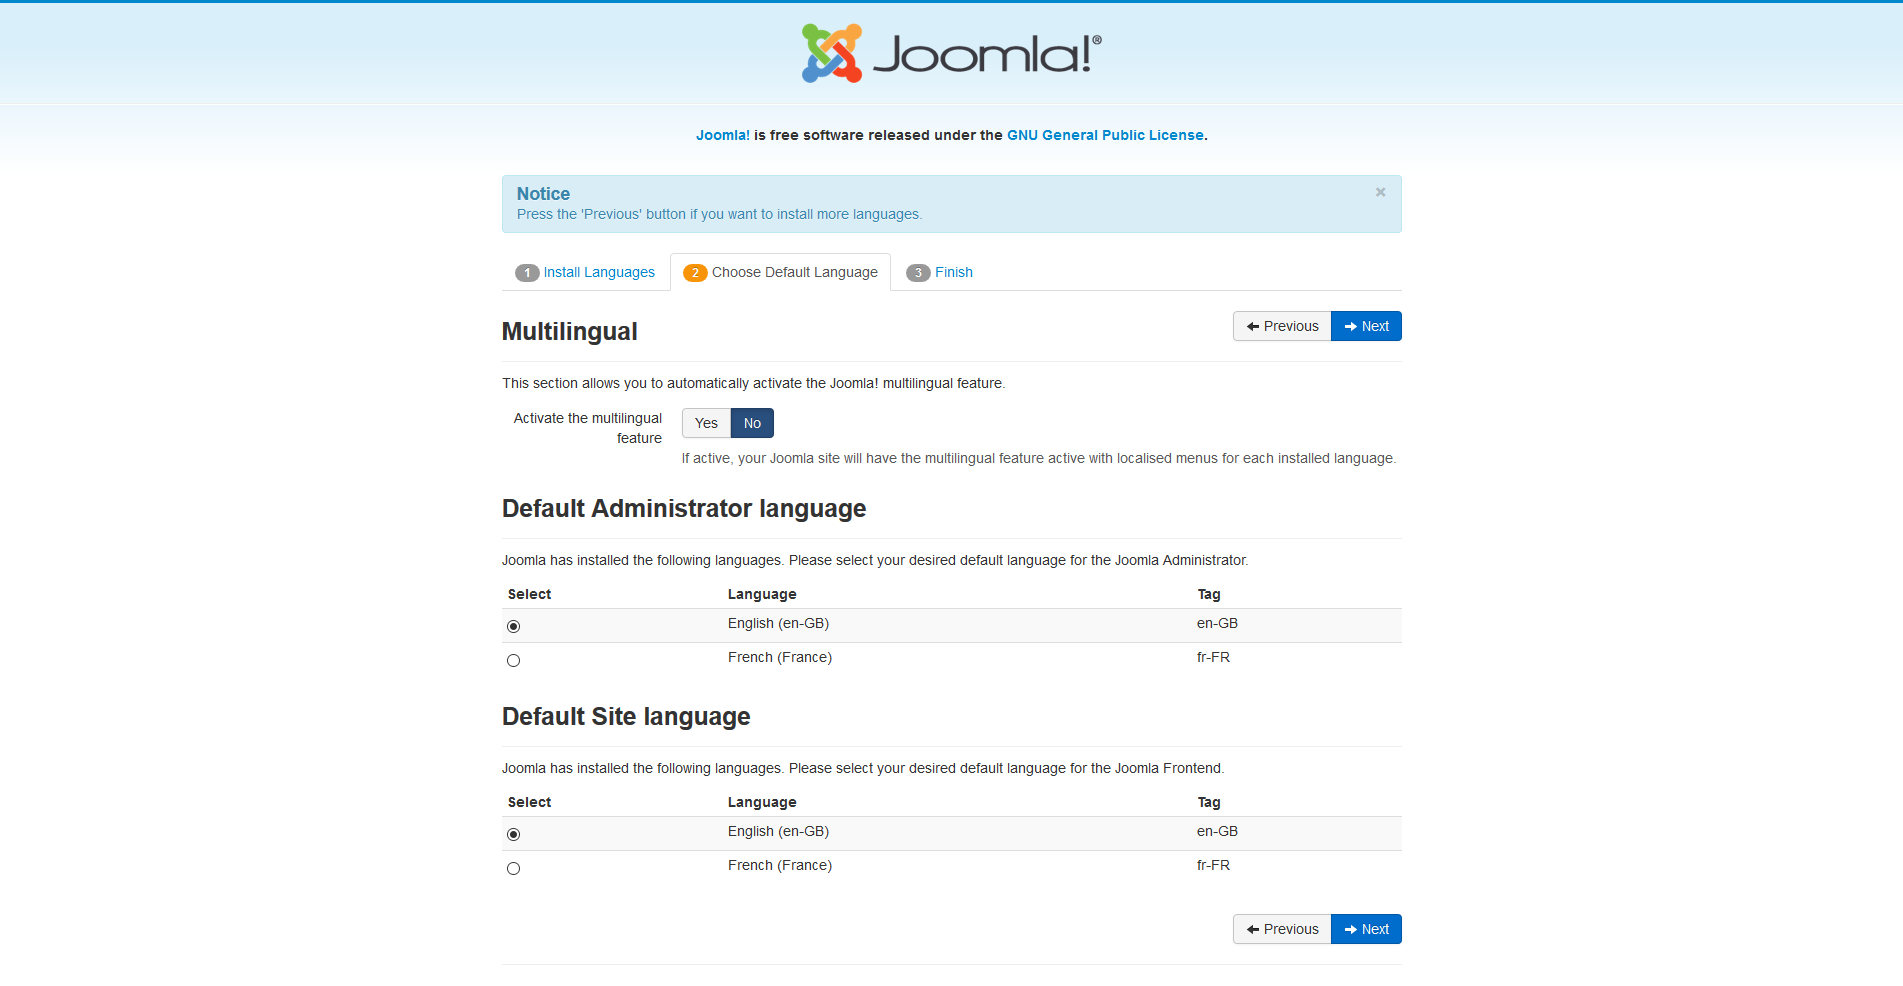

You may also choose to activate the multilingual features of Joomla! at this time too.
- Click Yes next to Activate the multilingual feature
- Two additional choice will appear.

- Install localised content, yes or no. This will automatically create one content category for each language installed and one featured article with dummy content for each content category installed.
- Enable the language code plugin, yes or no. If enabled, the plugin will add the ability to change the language code in the generated HTML document to improve SEO.

When you completed all the choices of language installation, click Next to proceed.
Finalise
You will now be presented with a very similar Congratulations! Joomla! is now installed. screen. The difference will be a notation of the default Administrator and Site language settings, if they were set. You will also not see the Extra Steps message in the bottom right.

Now you can delete the Installation Folder. Click on Remove Installation folder and a success message will appear. Now you can navigate to the Administrator log in by clicking Administrator or go right to your site by clicking Site.